
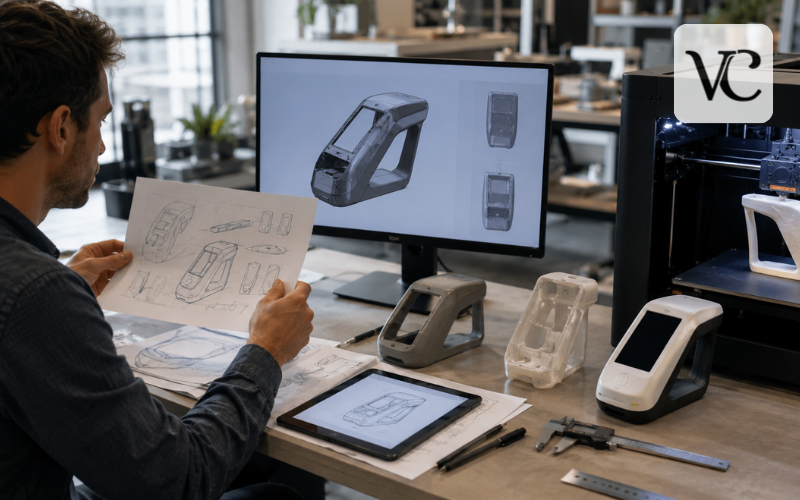
Rapid prototyping is a practical way to turn an idea into something that can be seen, handled, tested, or used before the final product is built. Instead of spending months perfecting a design in theory, a team creates an early version, studies how it performs, collects feedback, and improves it.
The same basic idea applies across several fields. Product designers and manufacturers use rapid prototyping to check the shape, fit, strength, or appearance of physical components. Software teams use it to explore features and technical ideas before developing a complete application. In UX and UI design, prototypes help teams test navigation, screen layouts, and user journeys. Additive manufacturing builds physical parts from digital models, while design platforms create interactive screen flows.
At the centre of rapid prototyping is a repeating cycle: build, test, gather feedback, refine, and test again. This article explains that cycle, the main prototype types, common 3D printing methods, machines, materials, software tools, practical examples, benefits, limitations, and current areas of development.
Snippet-Ready Definition:
Rapid prototyping is the process of quickly creating and testing physical or digital models so teams can identify problems, collect feedback, and improve a product before full development or mass production.
Rapid Prototyping Quick Guide
| Prototype type or method | Best used for | Main advantage | Key limitation |
| FDM 3D printing | Basic models and fit testing | Affordable and accessible | Visible layer lines |
| SLA 3D printing | Detailed visual prototypes | Smooth finish and fine detail | Resin requires cleaning and curing |
| SLS 3D printing | Strong functional parts | Supports complex shapes | Higher equipment and service costs |
| DMLS metal printing | Industrial metal prototypes | Produces strong metal components | Expensive and requires specialist handling |
| Low-fidelity prototype | Early ideas and user flows | Fast and easy to change | Limited realism |
| High-fidelity prototype | Detailed usability testing | Closely represents the final product | Takes more time to create |
| Software prototype | Features and technical concepts | Tests ideas before full development | May not be production-ready |
Step-by-Step Rapid Prototyping Guide
- Define the purpose: Decide what the prototype needs to test, such as appearance, fit, usability, strength, or technical feasibility.
- Create the initial design: Prepare a CAD model, sketch, wireframe, user flow, or basic software concept.
- Choose the right method: Select suitable 3D printing technology, material, software, and level of detail.
- Build the prototype: Produce a physical model or create an interactive digital version.
- Test the important features: Check performance, fit, appearance, navigation, user understanding, or functionality.
- Collect useful feedback: Ask users, designers, engineers, developers, and other stakeholders to review the model.
- Refine and repeat: Make changes based on the findings and create another version when further testing is needed.
How the Rapid Prototyping Process Works
The process normally begins with a problem, need, or design idea. For a physical product, the team may create a rough sketch and then convert it into a three-dimensional CAD model. For software or UX work, the starting point may be a user flow, screen map, wireframe, or small piece of working code. The first model only needs enough detail to answer a clear question.
Next, the team builds the prototype. A physical version may be printed or assembled, while a digital one may be clickable or partly functional. The team then tests the feature that matters most, such as whether two parts fit, whether a handle feels comfortable, whether a user can complete checkout, or whether a technical function is possible.
Feedback may come from users, engineers, designers, managers, clients, or other stakeholders. The findings are recorded, the design is changed, and another version is produced. This repeated learning process is what makes rapid prototyping valuable. Rapid development methods also treat testing and feedback as ongoing activities instead of waiting until the end of a project.
Main Types of Rapid Prototyping Models
A visual prototype mainly shows size, shape, colour, layout, or overall appearance. A proof-of-concept model is used to show that an idea or technical principle can work. A functional prototype is designed to perform one or more real tasks, although it may use different materials or construction methods from the finished product.
Physical engineering prototypes are often used to check fit, movement, assembly, comfort, and access to controls. Digital prototypes include wireframes, mockups, interactive screen flows, and small working applications. Their purpose may be to test content order, navigation, interactions, or technical feasibility.
Models also differ in fidelity, or their level of detail and realism. Low-fidelity prototypes are quick and simple. High-fidelity versions look and behave more like the final product. The right choice is the simplest prototype capable of answering the current question.
Key Benefits of Rapid Prototyping
The main benefit of rapid prototyping is earlier learning. A design that seems convincing on a screen may feel awkward when held, fail to fit another component, or confuse real users. Creating an early model reveals these problems before the team commits to expensive tooling, large production orders, or full software development.
Additive manufacturing is especially useful for customised parts, low-volume work, and design changes because it can produce parts directly from digital data without requiring a separate mould for every early version. NIST notes that additive manufacturing supports rapid innovation, complex designs, customisation, and improved economics for some lower-volume applications.
A physical object or interactive flow is easier to discuss than an abstract description. Engineers can point out manufacturing concerns, designers can explain the intended experience, users can show where they struggle, and decision-makers can understand what is being proposed. This shared reference reduces misunderstandings and supports evidence-based decisions.
Limitations and Challenges to Consider
A prototype is not always an accurate copy of the final product. A part printed in resin may look excellent but behave differently from an injection-moulded plastic component. An FDM model may be strong enough for a fit test but have visible layer lines. A clickable interface may demonstrate a user journey without containing real databases, security controls, error handling, or business logic.
Advanced machines, specialist materials, skilled operation, finishing, and repeated testing may be expensive. Accuracy and surface quality depend on the process, machine settings, geometry, material, part orientation, and finishing steps. NIST continues to study measurement, monitoring, material behaviour, and part qualification because dependable results require more than simply sending a file to a machine.
Digital teams face a similar risk. Prototype code may be written quickly to test an idea, but using it as final production code can create weak architecture, security gaps, poor performance, and difficult maintenance. Every prototype should therefore be linked to a clear decision, test, or uncertainty.
Rapid Prototyping and 3D Printing Methods
Rapid prototyping 3D printing creates a physical object from a digital model by adding material in layers. However, different printing methods produce different results.
Fused Deposition Modeling, or FDM, melts and extrudes thermoplastic filament through a nozzle. It is widely used for affordable concept models, fixtures, enclosures, and some functional parts. The process is accessible and works with many thermoplastics, although surface lines and directional strength must be considered.
Stereolithography, known as SLA, uses light to cure liquid photopolymer resin. It is well suited to small details, smooth surfaces, presentation models, dental applications, and parts that require fine features. Printed pieces normally need cleaning and further curing after printing.
Selective Laser Sintering, or SLS, uses a laser to fuse polymer powder into solid parts. The surrounding powder supports the part during printing, allowing complex shapes without many separate support structures. SLS is often chosen for durable functional prototypes and small batches.
Direct Metal Laser Sintering, or DMLS, uses a related powder-bed process for metal alloys and is used in demanding industrial fields such as aerospace, medical engineering, automotive work, and tooling.
Rapid Prototyping Machines, Materials, and Accuracy
A rapid prototyping machine may be a desktop filament printer, a resin system, a polymer powder machine, or an industrial metal platform. They differ in cost, build area, speed, materials, operating needs, and required skill.
Materials include thermoplastics, resins, nylon powders, composites, aluminium, stainless steel, titanium, cobalt chrome, and nickel alloys. The best material is not simply the strongest one. It should represent the property being tested. A visual model may need a smooth finish, while a snap-fit part may need flexibility. A heat-related test requires a material that can tolerate the expected temperature.
Accuracy is influenced by layer thickness, machine calibration, material shrinkage, support placement, build direction, temperature control, and post-processing. Build size and production speed also matter. Large parts may need splitting, while resin parts may need washing, support removal, and curing. Metal parts may require heat treatment, machining, or surface finishing.
Teams should compare the complete workflow, not only the printer’s advertised resolution.
Rapid Prototyping Software and Digital Tools
For physical products, CAD software is used to create and edit the three-dimensional model. Platforms such as Autodesk Fusion combine modelling, simulation, and manufacturing preparation.
Before many 3D printers can build the part, slicing software converts the model into thin layers and creates machine instructions. It controls settings such as orientation, supports, infill, speed, and temperature. UltiMaker Cura is one current example of widely available slicing software and can prepare models for many compatible machines.
For digital products, tools such as Figma let designers connect screens, create interactions, play user flows, and share prototypes for feedback. The best tool depends on the project, team size, required realism, file compatibility, security needs, learning curve, and budget.
A simple paper sketch may be more useful than advanced rapid prototyping software when the team is still deciding the basic structure.
Rapid Prototyping in Software Engineering
Rapid prototyping in software engineering means building a limited version of a system to explore requirements, test technical assumptions, or demonstrate how a feature may work. The prototype might include only one workflow, a basic interface, a simulated data source, or a small piece of real functionality.
A throwaway prototype is created to learn something and is then discarded. Its purpose may be to clarify requirements or compare possible solutions. An evolutionary prototype is developed in stages and may gradually become part of the real product.
Feedback helps developers discover missing requirements, confusing workflows, integration problems, and unrealistic expectations. A working demonstration should not be mistaken for a production-ready application. Final software also needs secure data handling, testing, accessibility, monitoring, performance planning, maintainable code, and reliable infrastructure.
IBM’s current guidance on rapid application development highlights both the value of continuous feedback and the danger of losing sight of larger architectural concerns during very fast iteration.
Rapid Prototyping in UX and UI Design
Rapid prototyping UX work focuses on how people interact with a digital product. A designer may begin by drawing screens on paper, arranging content blocks, and mapping the steps required to complete a task. This makes it possible to change the basic structure without spending time on polished colours, images, or animations.
Later, the screens can become interactive. Buttons, menus, forms, and transitions may simulate the finished interface. Figma, for example, supports interactive flows, triggers, actions, variables, and presentation modes that allow teams to test an experience before development.
Usability testing then asks representative users to complete realistic tasks. The team watches where they hesitate, choose the wrong option, miss important information, or fail to finish. The findings can improve navigation, labels, accessibility, and task completion.
The aim is not to prove that the design is good. It is to discover what needs improvement while changes are still relatively easy.
Low-Fidelity and High-Fidelity Prototyping
Low-fidelity prototypes are intentionally rough. They may consist of sketches, paper screens, storyboards, block diagrams, or simple digital wireframes. Their speed encourages experimentation because nobody has invested heavily in the appearance. They work well for comparing layouts, discussing ideas, checking information order, and testing basic flows.
High-fidelity prototypes include more realistic content, spacing, colours, branding, interactions, and sometimes working data or code. They are useful when the team needs to test detailed behaviour, demonstrate the experience to stakeholders, study visual clarity, or prepare for development.
The two levels are not rivals. They belong at different stages. A team can begin with several rough options, test the strongest direction, and then increase detail as uncertainty falls. Moving to polished work too early can waste time and make people less willing to challenge the design.
Fidelity should therefore match the decision being made rather than the desire to impress viewers.
Practical Rapid Prototyping Examples
Consider a company designing a handheld device. The first rapid prototyping model may be a simple printed shell used to check size and grip. A later functional prototype may use materials closer to the intended product and undergo drop, heat, or repeated-use testing.
An engineering team may print a new bracket to confirm hole positions and clearance before ordering machined metal parts. A medical-device team may create an enclosure to review access, cleaning, labelling, and assembly, while recognising that regulatory work continues beyond the prototype.
In digital work, a retailer may build an interactive checkout flow and ask users to purchase a sample item. The test may reveal that delivery options are unclear or that an error message appears too late.
These rapid prototyping examples show that the model is valuable because it answers a specific question, not because it looks finished.
Choosing the Right Rapid Prototyping Approach
The first step in choosing an approach is to define what the prototype must prove. Is the team checking appearance, fit, movement, strength, comfort, manufacturability, user understanding, technical feasibility, or stakeholder agreement?
For a physical part, the team should consider required dimensions, material behaviour, surface quality, build size, quantity, turnaround time, and finishing. A cheap FDM print may be ideal for a simple fit check, while SLA may be better for fine visual detail. SLS may suit a complex functional polymer part, and DMLS may be justified when metal behaviour or geometry must be studied.
For a digital product, the team should select the minimum fidelity needed. It should also define test participants, tasks, success measures, and the feedback to record. Each revision should be documented so the team knows what changed and why.
This keeps rapid prototyping focused on learning instead of endless redesign.
Rapid Prototyping Trends, Research, and Future Development
Rapid prototyping is moving toward more connected design, manufacturing, and testing workflows. Cloud-based systems make it easier to manage shared files, versions, comments, and preparation across locations.
Design platforms are adding AI-supported tools that can turn instructions into interactive prototypes or code, although human review remains essential.
In additive manufacturing, current research is focused not only on faster machines but also on process control, material performance, repeatability, and qualification. NIST’s AI2AM work studies machine learning, digital twins, digital threads, and related methods for improving process and quality assurance.
Its recent photopolymer manufacturing work also reflects continued efforts to improve shared measurement, standards, materials, and industrial reliability.
Metal, composite, multi-material, and higher-performance polymer systems continue to expand the range of possible prototypes and end-use parts. Readers who need technical research can follow peer-reviewed sources such as Rapid Prototyping Journal, which covers additive manufacturing and related technologies.
Conclusion
Rapid prototyping helps teams move from assumptions to evidence. By creating an early physical or digital model, they can test important questions, identify problems, gather useful feedback, and improve the design before making a larger commitment.
Its value does not depend on using the most advanced machine or the most realistic interface. A paper sketch, basic CAD print, functional software demo, or industrial metal part can all be appropriate when matched to the right goal. The key is to decide what must be learned, build only enough to test it, and record what the team discovers.
Used carefully, rapid prototyping supports faster development, clearer communication, lower risk, and better-informed decisions. It does not remove the need for engineering, validation, safety checks, or production planning. Instead, it makes those later steps more effective by helping teams understand the product before they fully build it.
Frequently Asked Questions
What is the main purpose of rapid prototyping?
The main purpose is to test a product idea before full development. It helps teams identify design problems, understand user needs, and make improvements while changes are still easier and less expensive.
Is rapid prototyping the same as 3D printing?
Not exactly. 3D printing is one method used to create physical prototypes. Rapid prototyping also includes CAD models, paper sketches, digital wireframes, interactive mockups, and early software versions.
Which 3D printing method is best for rapid prototyping?
The best method depends on the project. FDM is suitable for affordable models, SLA offers fine detail, SLS produces strong polymer parts, and DMLS is used for advanced metal prototypes.
How is rapid prototyping used in software engineering?
Software teams create limited working versions to test features, interfaces, workflows, and technical ideas. Feedback from these models helps developers clarify requirements before building the complete production system.
What is the difference between low-fidelity and high-fidelity prototypes?
Low-fidelity prototypes are simple, quick, and useful during early planning. High-fidelity prototypes include realistic visuals and interactions, making them more suitable for detailed usability testing and stakeholder presentations.
Disclaimer: This article provides general educational information about rapid prototyping. Methods, materials, software, costs, accuracy, and safety requirements vary by project. Consult qualified design, engineering, manufacturing, or software professionals before making technical or production decisions.
Enjoyed this article? Discover more helpful ideas and fresh inspiration on Vogue Cultures.