A shower can look clean from a distance while its tiles are slowly collecting soap residue, body oils, and minerals from the water. Over time, these deposits leave a cloudy film, dull the finish, and make grout lines look darker than they should. In a damp bathroom, mildew or mold may also appear around corners and joints.
Learning how to clean shower tiles is less about using the strongest product and more about choosing the right method for the surface. A soft cloth and gentle cleaner often handle everyday dirt, while stubborn marks may need a product designed for that particular problem. What works on glazed ceramic may not be suitable for marble or other natural stone.
This guide explains how to clean walls, floors, and grout, deal with common stains, and keep buildup from returning. The aim is a cleaner shower without unnecessary scrubbing or damage.
Snippet-Ready:
To clean shower tiles, use a tile-safe mild cleaner, scrub gently with a soft sponge, rinse thoroughly, and dry the surface. voguecultures.co.uk only provides information about how to clean shower tiles and nothing else.
Quick Guide Table: Shower Tile Cleaning
| Possible Problem | What to Check | Recommended Action |
| Soap scum | Cloudy, sticky buildup | Use mild dish soap or a tile-safe cleaner. |
| Hard water stains | White, chalky deposits | Use a suitable mineral deposit remover approved for the surface. |
| Dirty grout | Dark or discolored grout lines | Gently clean with a grout-safe cleaner and soft brush. |
| Mold or mildew | Dark spots in damp areas | Clean small affected hard surfaces and dry thoroughly. |
| Dull shower tiles | Soap residue or water marks | Clean gently, rinse well, and wipe dry. |
| Natural stone stains | Stains on marble or limestone | Use a pH-neutral stone cleaner and avoid acidic products. |
Easy Steps to Clean Shower Tiles
- Prepare the shower: Remove bottles and accessories, and ensure proper ventilation.
- Rinse with warm water: Wet the tiles to loosen surface dirt and soap residue.
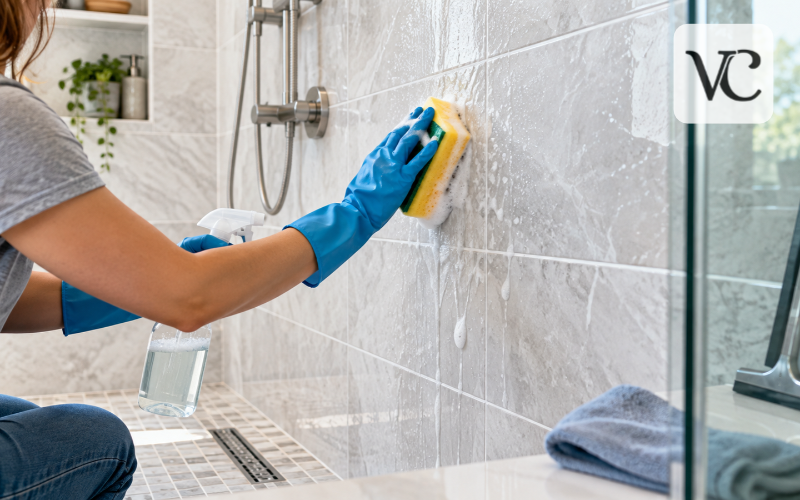
- Apply a suitable cleaner: Use mild dish soap or a cleaner approved for your tile material.
- Scrub gently: Clean tiles and grout using a soft sponge or soft-bristled brush.
- Rinse thoroughly: Remove loosened dirt and cleaning product residue with clean water.
- Dry the surfaces: Use a microfiber cloth or squeegee to reduce streaks and water spots.
Know Your Shower Tile Type Before Cleaning
Before opening a bottle of cleaner, take a closer look at your tiles. Ceramic and porcelain tiles are common in bathrooms because they are durable and relatively easy to maintain. Glazed versions have a protective surface, but abrasive pads can still leave scratches or dull the finish. Porcelain is usually less absorbent than ordinary ceramic, although grout between the tiles needs separate care.
Glass tiles show streaks and water spots easily. Mild cleaner and a soft microfiber cloth are usually good choices, but decorative glass can have special coatings or finishes. Follow the manufacturer’s guidance if you have it.
Natural stone needs more attention. Marble, limestone, and travertine can react to acidic cleaners, leaving pale, rough-looking marks that ordinary washing cannot remove. Slate and other stones vary, so a cleaner approved for your specific stone is safest.
If you are unsure what was installed, check any leftover tiles, packaging, or installation documents. Until you know, use a suitable pH-neutral cleaner, test a hidden spot, and avoid acids and rough brushes.
Best Cleaners and Tools for Shower Tiles and Grout
For routine cleaning, start with warm water and a small amount of mild dish soap, or a pH-neutral product labeled for your tile and grout. A pH-neutral cleaner is neither strongly acidic nor strongly alkaline, making it a useful starting point for many shower surfaces. Always check the label, especially when tiles have a special coating or the grout has been sealed.
Keep the cleaning kit simple. A soft sponge loosens surface grime, a microfiber cloth wipes away residue, and a soft-bristled brush reaches textured tiles and grout lines. A squeegee is useful for removing water after cleaning. Gloves protect your hands, while ventilation makes the task more comfortable.
The best cleaner for shower tile and grout depends on what you are removing. A mild everyday cleaner may handle oils and light soap film, but mineral scale may need a compatible specialist product. Avoid choosing harsh chemicals just because they promise quick results. A strong cleaner used on the wrong surface can create a bigger problem than the stain itself.
How to Clean Shower Tile Walls Step by Step
First, move shampoo bottles, soap dishes, and hanging accessories out of the way. Turn on the bathroom fan or open a window. If the shower has loose hair or dust along ledges, remove it before washing so it does not spread across the walls.
Next, lightly rinse the tile walls with warm water. This softens some of the surface film and helps you see which areas need more attention. Apply your tile-safe cleaner according to its directions, working on a manageable section rather than coating the whole shower at once. Give it the contact time stated on the label, but never let a product dry on the surface unless the instructions specifically allow it.
Use a non-scratch sponge or soft brush to loosen dirt, moving gently over the tiles and around the grout. Pay particular attention to the lower walls, where soap residue often collects. Avoid putting heavy pressure on decorative edges or damaged joints.
Finally, rinse well with clean water, including the corners and bottom rows. Wipe down the walls with a microfiber cloth or squeegee. Removing the remaining droplets helps prevent new water spots and leaves the finish looking clearer.
How to Clean Shower Floor Tiles and Grout
Shower floors tend to collect more grime than the walls. Shampoo, body wash, hair, and dirty water settle on the surface, especially around the drain. Textured floor tiles may also hold residue in their small grooves.
Begin by clearing loose hair and debris from the drain cover and floor. Apply a suitable tile-and-grout cleaner, following the manufacturer’s instructions. Work it into the textured areas with a soft brush. A long-handled brush can make the job easier, but avoid stiff bristles that might wear grout or scratch a delicate finish.
For grout lines, use a dedicated soft grout brush and light, repeated strokes. Cement-based grout can absorb stains, so cleaning may improve its appearance without removing every old mark. If the grout is cracked, crumbling, or missing, it needs repair rather than harder scrubbing.
Rinse toward the drain until no slippery cleaner remains, then remove standing water where possible. Do not stand on the floor while it is soapy. Make sure the surface is safe and dry enough before using the shower again.
Removing Soap Scum and Hard Water Deposits
Soap scum and hard water deposits often look alike, but they are not the same. Soap scum is a sticky or cloudy film formed when soap residue mixes with minerals and body oils. Hard water leaves mineral deposits that can feel chalky or crusty, especially near taps and along the bottom of shower walls.
For light soap scum, a mild cleaner and a soft sponge may be enough. Let the product work for the recommended time before wiping it away. Rinse thoroughly, since leftover cleaner can attract more dirt or make the tiles look streaky.
Mineral buildup may require a limescale remover, but only if its label confirms that it is safe for the tile, grout, and nearby fittings. Many descalers contain acids, which can harm natural stone and cement-based grout. Protect sensitive joints and follow the surface manufacturer’s guidance instead of trying an acidic cleaner on an unknown material.
A thick deposit may need several careful cleaning sessions. Forcing it off with a metal scraper or abrasive pad can damage the surface beneath it.
How to Remove Stubborn Stains From Shower Tiles
Not every shower stain has the same cause. Yellow or brown marks may come from mineral deposits, residue, or metal staining. Orange discoloration can sometimes be associated with iron in the water or with surface buildup in persistently damp areas. Dark patches may be trapped dirt, mold, or discoloration within the grout. Color alone is not enough to identify the problem.
Start by washing the affected area with a cleaner suitable for the tile material. If the mark remains, check whether it sits on the surface or appears to be inside the grout or stone. A cleaner made for the specific stain may work better than repeated scrubbing with an everyday product.
Always test stain treatments in an inconspicuous area and follow instructions about contact time. Some products can bleach colored grout or affect finishes even when the surrounding tile looks unharmed.
If a mark remains after appropriate cleaning, it may be permanent staining, an etched surface, or a moisture problem behind the tile. A tile professional can help determine whether restoration or repair is possible.
Cleaning Shower Tiles With Vinegar: What You Should Know
Many online tips suggest how to clean shower tiles with vinegar because vinegar can dissolve certain mineral deposits. However, it is not a safe all-purpose solution for a tiled shower. Even when ceramic or porcelain tile itself can tolerate diluted vinegar, the cement-based grout between the tiles may not.
Vinegar is acidic. Repeated exposure can weaken cement-based grout, while marble, limestone, and travertine may develop dull or etched patches after contact. Some metal finishes and protective coatings are sensitive to acidic cleaners too. Diluting vinegar does not automatically make it safe for every installation.
If a tile manufacturer explicitly permits diluted vinegar on a particular acid-resistant surface, follow its instructions and keep it away from incompatible materials. For most routine cleaning, a pH-neutral tile cleaner is the simpler option. For limescale, choose a product specifically approved for the complete shower surface, including the grout.
Never combine vinegar with bleach or other cleaning chemicals.
Natural Ways to Clean Shower Tiles Safely
If you prefer a simple approach, warm water and a little mild dish soap can be useful for routine cleaning. Mix a small amount in a bowl, wipe the tiles with a soft sponge, and rinse until the water runs clear. Using too much soap can leave another film behind, so more is not necessarily better.
Baking soda is often suggested for cleaning grout, but it has a mildly abrasive texture. On some durable surfaces, a little baking soda mixed with water may help loosen residue. It is not a universal solution for polished stone, glass coatings, delicate finishes, or vulnerable grout. Test first and avoid aggressive scrubbing.
Natural ingredients are not always safer simply because they come from the kitchen. Lemon juice and vinegar are acidic, and mixing household ingredients can produce unpredictable results or reduce their cleaning effectiveness.
If you do not know the tile material, use a gentle, manufacturer-approved cleaner rather than experimenting. Proper rinsing, drying, and regular maintenance often make more difference than complicated homemade mixtures.
How to Clean Shower Tiles With Less Scrubbing
It is possible to clean shower tiles with less scrubbing, although a completely hands-free method will not remove every stubborn deposit. The key is to give a suitable cleaning product time to loosen grime rather than immediately attacking it with a brush.
Apply the cleaner to a small section and leave it for the time recommended on the label. Then wipe with a damp microfiber cloth or soft sponge. For tall walls, a long-handled, non-scratch cleaning tool can help you reach comfortably without stretching. Repeat the process if necessary instead of using more pressure.
For light maintenance, wiping away fresh water droplets after a shower prevents some marks from forming in the first place. That makes future cleaning much easier.
Be cautious with steam cleaners and powered scrubbers. Heat, pressure, or stiff attachments may be unsuitable for certain tiles, grout, sealants, or coatings. Check the surface and equipment instructions before using them.
Removing Mold and Mildew From Shower Tiles and Grout
Dark spots around grout lines, corners, and silicone sealant often raise concerns about mold. Mold thrives where moisture remains for long periods, particularly in bathrooms with poor airflow. Not every dark stain is mold, but recurring damp patches deserve attention.
For a small patch on hard, washable tile, clean with a suitable detergent and water, gently remove the visible growth, then rinse and dry the area completely. Wear gloves, ventilate the room, and avoid splashing. Routine mold cleanup does not usually require bleach; removing the growth and controlling moisture matter more than simply trying to kill it.
Grout and sealant are more complicated. If discoloration has worked deeply into damaged grout or mold is growing beneath silicone, surface cleaning may not solve the problem. Old or loose sealant may need careful replacement after the underlying area is cleaned and dried.
If mold covers a large area, keeps returning despite ventilation, or seems to be coming from behind the tiles, seek professional advice. Anyone with asthma, allergies, or a weakened immune system should also take extra care around mold cleanup. Fix leaks and improve airflow to reduce the chance of regrowth.
Common Shower Tile Cleaning Mistakes to Avoid
A frequent mistake is assuming that a cleaner safe for one tile must be safe for another. Acidic products can damage natural stone and cement-based grout, while abrasive powders and steel wool may scratch glazed tiles or glass. Even hard-wearing porcelain can have a finish that needs gentle treatment.
Another problem is using too much product. Thick layers of soap or cleaner can be difficult to rinse off and may leave a cloudy film. Leaving a product on longer than the label recommends can also damage grout, coatings, and metal fittings.
Never mix bleach with vinegar, ammonia, or other cleaners. Dangerous fumes can form, and combining products does not make cleaning more effective. If switching products, thoroughly rinse the area first and follow the label instructions. Ventilate the bathroom and use gloves or eye protection when recommended.
Finally, do not ignore cracked grout, loose tiles, or failing sealant. Cleaning cannot correct a water leak or repair a damaged shower surface. Continued moisture behind the tiles may create a much larger problem.
Easy Habits to Keep Shower Tiles Clean for Longer
The simplest way to reduce buildup is to remove water before it dries. After showering, run a squeegee down smooth tile walls or wipe them with a microfiber cloth. This small habit limits water spots and reduces the damp conditions that encourage mold growth.
Let the bathroom dry out as well. Use an exhaust fan that vents outdoors, or open a window when practical, and keep airflow moving after the shower. Spread the curtain out so it can dry, and avoid leaving wet cloths or bottles pressed against the wall for long periods.
A gentle weekly clean is usually easier than waiting for a thick layer of soap scum to form. Pay attention to the shower floor, corners, drain cover, and grout lines where residue collects. The right frequency depends on how often the shower is used and whether your water leaves heavy deposits.
Check the grout and silicone occasionally for cracks, gaps, or persistent dampness. Fixing small maintenance issues early helps protect the tiles and the surfaces behind them.
Conclusion
Knowing how to clean shower tiles begins with understanding what your tiles are made of. For most everyday dirt, a suitable mild cleaner, a soft sponge, thorough rinsing, and careful drying are more useful than harsh chemicals. Soap scum, mineral scale, stubborn stains, and mold may each need a different approach, so identify the problem before treating it.
Remember that grout and natural stone can be more sensitive than the tiles around them. Avoid acidic or abrasive methods unless the manufacturer confirms they are appropriate, and treat recurring moisture problems as a repair or ventilation issue rather than simply a cleaning challenge.
With gentle weekly care and a quick wipe after showers, it is easier to keep the whole shower looking clean without wearing down its finish.
Frequently Asked Questions
How often should you clean shower tiles?
Shower tiles generally benefit from gentle cleaning once a week, depending on how frequently the shower is used. Wiping away water after each shower can help prevent soap scum, mineral deposits, and mildew.
Can you use vinegar to clean shower tiles?
Vinegar may remove mineral deposits from certain acid-resistant tiles, but it can damage natural stone and cement-based grout. Check manufacturer instructions before using it, or choose a suitable pH-neutral cleaner instead.
How do you clean shower tiles without heavy scrubbing?
Apply a tile-safe cleaner and leave it for the recommended contact time. Wipe gently with a soft sponge, rinse thoroughly, and repeat if needed. Stubborn deposits may still require careful brushing.
What is the best way to remove mold from shower grout?
Clean small affected areas with a suitable detergent and water, then dry thoroughly. If mold repeatedly returns or has penetrated damaged grout or sealant, professional inspection or repair may be necessary.
How can you keep shower tiles clean for longer?
Use a squeegee after showering, maintain good bathroom ventilation, and clean tiles regularly with gentle products. Keeping surfaces dry and checking grout and sealant for damage can help prevent recurring buildup.
Disclaimer: This article on voguecultures.co.uk is provided strictly for general informational and educational purposes. It shares practical guidance on cleaning shower tiles, grout, and bathroom surfaces. No guest posting, paid promotion, sponsorship, or advertising is involved in this article. Cleaning results may vary depending on tile materials, surface conditions, and cleaning products. Always follow manufacturer instructions and test suitable products on a small, hidden area before use. voguecultures.co.uk does not provide professional cleaning, restoration, or repair services through this article.
Enjoyed this article? Discover more helpful ideas and fresh inspiration on Vogue Cultures.