A kitchen can look tidy while still hiding grease above the cupboards, crumbs inside drawers and dried spills behind appliances. Everyday cleaning usually means washing dishes, wiping worktops and sweeping the floor. A deep clean goes further. It tackles the places you rarely reach, removes built-up dirt and helps prevent harmful bacteria from spreading around food preparation areas.
Learning how to deep clean a kitchen is easier when you follow a clear order instead of trying to tackle everything at once. Start high, move downwards and leave the floor until last. Dust and crumbs will then fall onto areas you have yet to clean. With suitable products and a little planning, you can work through the room without repeatedly wiping the same surfaces.
Snippet-Ready Definition:
Deep cleaning a kitchen means removing built-up grease, dust, food residue and dirt from appliances, cupboards, worktops and floors. VogueCultures.co.uk provides educational information only, helping readers clean their kitchens safely and effectively.
Quick Guide: Kitchen Deep Cleaning Table
| Kitchen Area | Cleaning Method | Main Focus |
| Ceilings and extractor | Dust and suitable degreaser | Dust and cooking grease |
| Cabinets and doors | Mild soapy water | Sticky marks and crumbs |
| Oven and hob | Appliance-safe cleaner | Burnt food and grease |
| Fridge and microwave | Gentle cleaning | Food spills and residue |
| Worktops and sink | Surface-safe cleaner | Stains and dirt |
| Floors | Sweep and suitable mop | Crumbs and footprints |
How to Deep Clean a Kitchen Step by Step
Follow these seven simple steps for an organised kitchen deep clean:
- Prepare the kitchen: Remove clutter, wash dishes and gather cleaning supplies.
- Start at the top: Dust ceilings, lights, extractor fans and cupboard tops.
- Clean cabinets: Empty drawers, wipe shelves and remove grease from doors.
- Deep clean appliances: Clean the oven, hob, fridge, microwave and dishwasher.
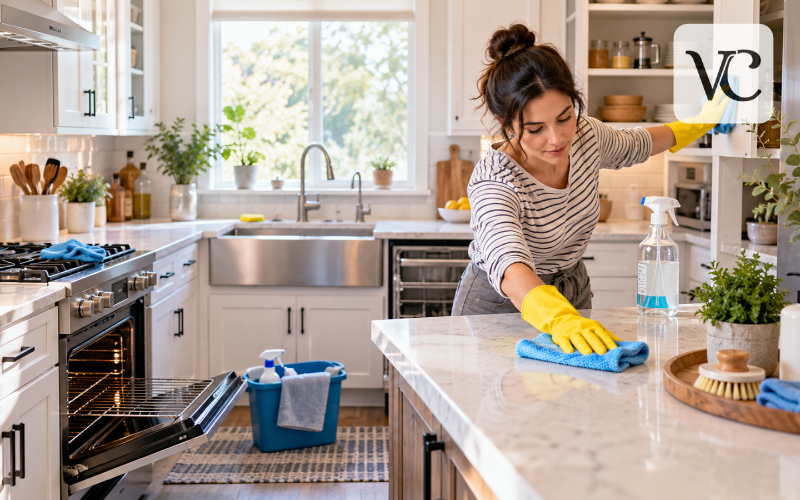
- Wash worktops: Remove food residue, sticky stains and grease from surfaces.
- Clean the sink and bins: Scrub the basin, wipe taps and wash waste containers.
- Finish with floors: Sweep corners, clean skirting boards and mop towards the doorway.
What You Need Before Deep Cleaning Your Kitchen
Gather your supplies before starting so you are not searching for a clean sponge halfway through the job. You will need several microfibre cloths, non-scratch sponges, a soft brush or old toothbrush, washing-up liquid, a bucket, rubber gloves, a vacuum cleaner or broom and a suitable floor mop. Keep a kitchen-safe degreaser, appliance cleaner and any specialist products recommended for your worktops nearby.
Use separate cloths for food preparation areas and dirtier jobs such as bins and floors.
Allow roughly two to three hours for a moderately sized kitchen in reasonable condition. A greasy oven, crowded cupboards or a large kitchen may take considerably longer. There is no need to rush or complete everything in one day.
Open a window where practical, read product labels and protect your hands when using stronger cleaners. Never mix bleach with vinegar, ammonia or other cleaning chemicals. Test unfamiliar products on a discreet area first, and keep moisture away from plugs, switches and appliance controls.
How to Clean a Kitchen From Top to Bottom
The simplest way to clean a kitchen step by step is to divide it into seven stages: prepare the room; dust higher surfaces; clean cupboards; tackle cooking appliances; clean the fridge and smaller appliances; wash worktops and the sink; then finish with bins, skirting boards and floors.
First, wash or move dirty dishes and clear enough space to work. Check appliance instructions and apply suitable pre-treatment to stubborn grease only where the product label allows. While it works, move on to dry dusting. Cleaning products need their stated contact time; leaving them on for longer is not necessarily better.
Start at one end of the room and work towards the other, dealing with one section at a time. Do the highest accessible areas before lower ones. Keep a separate cloth for cleaning food-contact surfaces, and change dirty cleaning water regularly so you do not spread grease around.
When a task feels too big, split it up. You might clean cupboard interiors one afternoon and appliances the next.
Start With Ceilings, Light Fixtures and Extractor Fans
Use a long-handled duster to remove cobwebs from ceiling corners and dust from the tops of door and window frames. For accessible light fittings, switch the power off and let bulbs cool before dusting with a dry cloth. Do not spray cleaner into electrical fittings or stretch from an unstable chair to reach high spots.
Extractor fans and cooker hoods collect a sticky mixture of cooking grease and dust. Wipe the outside with a soft cloth and a product suitable for its finish. If the hood has removable metal grease filters, wash them as directed in the manual and let them dry completely. Some filters can go in the dishwasher; charcoal filters may need replacing rather than washing.
Finish this area by wiping washable wall surfaces and the tops of cupboards. If grease has hardened, hold a cloth dampened with warm, soapy water against it briefly, then lift it away gently. Avoid soaking painted walls, wallpaper or wooden surfaces.
How to Deep Clean Kitchen Cabinets, Drawers and Doors
Empty one cupboard or drawer at a time. Check use-by dates, discard spoiled food and move older pantry items towards the front. A best-before date usually relates to quality, so assess those foods separately rather than automatically throwing them away.
Vacuum loose crumbs from corners and shelf edges. Wipe shelves and drawer interiors using a cloth lightly dampened with warm water and a little washing-up liquid, provided the material allows it. Remove soap residue, then dry thoroughly before returning food, crockery or utensils.
Wondering how to deep clean kitchen cabinets without harming the finish? Start with the gentlest method. Painted doors, laminate and sealed wood often respond well to mild soapy water, but unsealed or delicate wood may require a specialist cleaner. Never flood joints or scrub with abrasive pads.
Kitchen doors need attention around handles, grooves and edges, where fingerprints and grease gather. Work carefully around hinges with a barely damp cloth or soft brush. Dry metal fittings and surfaces afterwards to avoid marks or moisture damage.
Deep Clean the Oven, Hob and Cooking Areas
Make sure the oven and hob are completely cool. Take out removable racks and trays, then wash them in warm water with washing-up liquid if their care instructions permit it. For stubborn deposits, use an oven cleaner approved for your model, following the label’s instructions for application, ventilation and rinsing. Keep products away from parts the manual says not to clean, such as certain seals, coatings and heating elements.
Wipe away softened grease with a non-scratch sponge, then rinse as instructed. If your oven has a self-cleaning programme, follow the manufacturer’s guidance instead of combining it with chemical cleaners.
The hob needs a method matched to its design. On gas hobs, lift removable pan supports and burner caps only when cool; clean and dry them before refitting. Avoid wetting ignition components. Ceramic and induction glass need a soft cloth and compatible cleaner, with an approved hob scraper only when instructed. Electric coil hobs require particular care to keep water out of electrical connections.
Finally, wipe the splash zone, exposed control panels and removable knobs where the manual permits removal. Avoid spraying directly into controls.
Clean the Fridge, Freezer and Food Storage Areas
Clean the fridge in sections so chilled food spends as little time outside as possible. Use a cool box with ice packs for meat, dairy and other perishable foods while you work. Check use-by dates and throw away food that is spoiled or unsafe. Aim to keep the fridge at 5°C or below once everything is back inside.
Remove shelves, drawers and door trays as the manual allows. Let cold glass parts warm slightly before washing; sudden temperature changes can crack them. Wash removable pieces in mild soapy water, rinse and dry. Wipe interior walls and door seals with a suitable cloth, paying attention to crumbs lodged in folds and corners.
Clean accessible exterior handles and surfaces, including the top of the fridge. Check that the door closes properly and avoid packing food so tightly that air cannot circulate. Store raw meat and fish securely on a lower shelf, separate from ready-to-eat foods.
For the freezer, follow the model’s defrosting instructions if ice has built up. Keep frozen food insulated during cleaning, and never chip ice away with a knife. Dry the compartment thoroughly before restarting or replacing food as directed by the manufacturer.
Refresh the Microwave, Dishwasher and Small Appliances
Microwave splashes are usually easier to remove after they have softened. Place a microwave-safe bowl of water inside, heat it briefly until steamy, then allow it to cool before opening and wiping. Handle the bowl carefully, as hot water and steam can burn. Wash the turntable separately if it is removable. Avoid spraying liquid into vents or controls.
For the dishwasher, take out and rinse the filter according to the manual. Check the spray arms for trapped food and wipe around the door seals and edges. Run a maintenance cycle with a dishwasher-cleaning product approved by the manufacturer if needed. Vinegar is not suitable for every machine, so do not assume it is a universal cleaner.
Unplug small appliances before wiping them, when appropriate and safe to do so. Empty crumbs from the toaster tray, descale kettles and coffee machines using their recommended methods, and clean sticky appliance handles. Never immerse electrical appliances in water unless the instructions specifically allow it.
Move smaller items aside to clean the worktop underneath. Dry everything fully before reconnecting or using appliances again.
Remove Grease and Stains From Worktops and Splashbacks
Clear the worktops completely, including jars, utensils and chopping boards. Brush away loose crumbs before washing the surface. Warm water and a little washing-up liquid often remove fresh grease, but baked-on splashes may need a suitable kitchen degreaser and time to soften. Always follow the product label, especially on surfaces used for preparing food.
Different materials need different care. Granite and marble are best cleaned with a mild, stone-safe product; acidic vinegar or lemon cleaners can damage some natural stone and its finish. Quartz usually needs gentle washing rather than harsh chemicals or abrasive pads. Laminate should not be soaked at seams, while wooden worktops should be wiped with minimal water and dried promptly.
Use a soft brush for textured tiles and grout, avoiding force that could loosen grout or scratch a glazed surface. Clean grease from splashbacks and wipe away residue with a fresh cloth. If a disinfectant is needed after handling raw food, choose one suitable for food-contact surfaces and follow its stated contact and rinsing instructions.
Deep Clean the Kitchen Sink, Taps and Bins
Leave the sink until most other washing is finished. Remove food scraps, rinse the basin and scrub with a non-scratch sponge and mild washing-up liquid. Stainless steel sinks look better when wiped along the grain and dried afterwards. Ceramic and composite sinks may need different cleaners, so check their care guidance before using powders or acidic products.
Pay special attention to the tap base, plughole rim and seams where grime collects. A soft toothbrush can reach narrow gaps. For limescale, use a product approved for your tap and sink finish; acidic products can damage certain coatings or nearby stone. Clear any accessible drain strainer by hand while wearing gloves. If a drain remains blocked, use an appropriate method or seek professional help rather than mixing drain chemicals.
Empty the rubbish and recycling bins, wash washable liners or containers and clean the lids, rims and foot pedals. Rinse and dry them completely before fitting fresh bags. Regularly removing food waste and dealing with spills at once will do more for odours than simply masking them with fragrance.
Finish With Kitchen Floors and Skirting Boards
Once the higher surfaces are clean, wipe skirting boards, lower cupboard edges and door frames. A damp cloth usually works for washable paint, but keep liquids away from sockets and switches.
Sweep or vacuum the floor, starting at the edges. Pay attention to crumbs under the kickboards and under movable furniture. Only move appliances if you can do so safely without pulling cables, gas connections or water hoses.
Choose a floor cleaner suitable for the material. Ceramic tiles generally tolerate a damp mop, while laminate and timber floors need much less water. Vinyl may also have product-specific restrictions. Do not assume steam cleaning is safe for every floor. Mop from the far side of the kitchen towards the doorway, then allow the floor to dry before walking on it.
A Practical Deep Clean Kitchen Checklist
A short deep clean kitchen checklist helps you keep track of what is finished, especially when the job is spread across several days. Use these seven stages as a simple guide:
- Prepare: Clear dishes, gather supplies, protect food and deal with clutter.
- Dust high areas: Clean ceiling corners, light fittings, extractor hood and cupboard tops.
- Empty and clean storage: Wipe cupboards, drawers, shelves, kitchen doors and handles.
- Clean cooking equipment: Tackle the oven, hob, racks and greasy cooking areas.
- Refresh appliances: Clean the fridge, freezer, microwave, dishwasher and small appliances.
- Wash surfaces and sink: Clean worktops, splashbacks, taps, basin and accessible drain fittings.
- Finish low down: Empty and clean bins, wipe skirting boards, sweep and mop floors.
Before calling the job complete, check easy-to-miss places such as the underside of handles, fridge door seals, the toaster crumb tray and the space behind movable countertop appliances.
You can print this page or use your browser’s Print option and select Save as PDF to keep a kitchen deep cleaning checklist PDF for next time.
A commercial kitchen deep cleaning checklist is different. Food businesses also need documented cleaning schedules, suitable disinfectants, staff responsibilities and procedures that meet applicable food hygiene requirements. A home checklist should not replace those workplace controls.
Keep Your Kitchen Cleaner Between Deep Cleans
A thorough clean lasts longer when small jobs become part of everyday life. Wipe spills as soon as surfaces are safe to touch, wash dishes, clear food scraps and leave the sink reasonably clean after cooking. Dry damp cloths and replace or launder them regularly so they do not spread dirt between surfaces.
Each week, give the hob and cupboard handles extra attention, check fridge leftovers, empty crumbs from small appliances and mop the floor as needed. Every month or so, inspect extractor filters, fridge seals, drains and harder-to-reach areas. The right frequency depends on how often you cook, the amount of grease produced and how quickly dirt builds up.
Some common mistakes make cleaning harder. Using too much product can leave sticky residue, while soaking wood or laminate may cause swelling. Scrubbing delicate surfaces with rough pads can damage them, and reusing a dirty cloth can move grime rather than remove it. Always clean before applying a disinfectant when disinfection is needed, and follow its label rather than guessing the required time. Try keeping worktops less crowded and wiping splashes before they dry.
Conclusion
Knowing how to deep clean a kitchen does not mean buying lots of products or scrubbing every surface as hard as possible. The most effective approach is to prepare properly, start high, work through storage and appliances, and finish with the sink and floor. Taking time to clean overlooked places such as extractor filters, cupboard handles and fridge seals makes the result more complete.
Choose methods that suit each material, follow appliance instructions and keep food safety in mind. With a manageable checklist and a few regular habits, your kitchen can stay cleaner, more organised and more comfortable to cook in.
Frequently Asked Questions
How often should you deep clean your kitchen?
Most kitchens benefit from a thorough deep clean every one to three months. However, kitchens used for frequent cooking or frying may need more attention, especially around appliances, cupboards and extractor fans.
How long does it take to deep clean a kitchen?
Deep cleaning a small or moderately sized kitchen usually takes around two to three hours. Larger kitchens, heavily greased ovens and overcrowded cupboards may require additional time or several cleaning sessions.
What is the best way to remove grease from kitchen cabinets?
Start with warm water, washing-up liquid and a soft cloth. For stubborn grease, use a cleaner suitable for the cabinet material. Avoid abrasive sponges, excessive moisture and strong chemicals that could damage finishes.
Can you use vinegar to deep clean a kitchen?
Vinegar can help remove some mineral deposits, but it is unsuitable for certain surfaces, including marble and some natural stones. Always check manufacturer instructions before applying vinegar to worktops, appliances or delicate finishes.
Should you clean kitchen floors first or last?
Kitchen floors should be cleaned last because dust, crumbs and grease can fall from higher surfaces during cleaning. Start with cupboards and appliances, then finish by sweeping and mopping the floor.
Disclaimer: This article on VogueCultures.co.uk is published strictly for general educational and informational purposes. It is not a guest post, sponsored article, paid promotion or advertisement. We do not promote or provide professional kitchen cleaning services through this content. All cleaning guidance is intended to help readers understand safe household cleaning practices. Results may vary depending on kitchen surfaces, appliances and cleaning products. Always follow manufacturer instructions and product safety labels before cleaning.
Enjoyed this article? Discover more helpful ideas and fresh inspiration on Vogue Cultures.