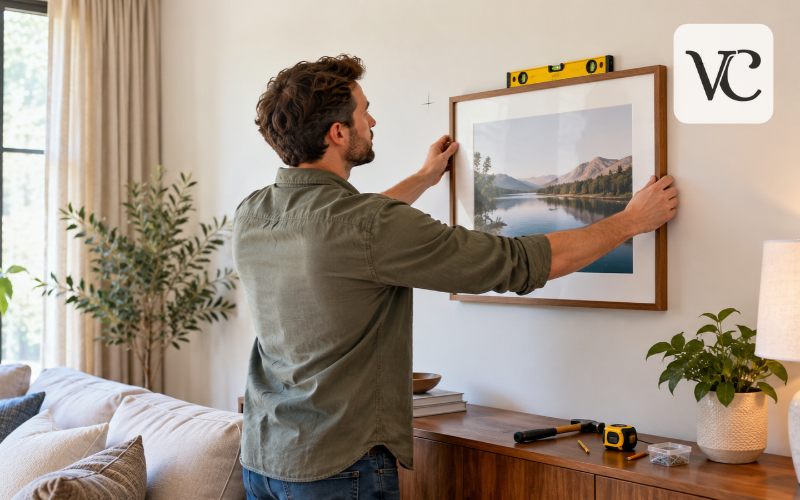
A framed photo or piece of art can make a room feel more personal, but hanging it well takes more than putting a nail in the wall. The frame needs to sit at a comfortable height, look balanced in its surroundings, and stay safely in place.
If you are wondering how to hang a picture frame for the first time, start by checking three things: where it will go, what hanging fittings are on its back, and what your wall is made from. The following guide explains each stage in plain English, including methods for wire, sawtooth hangers, two hooks, and hanging without nails.
Snippet-Ready Definition:
Hanging a picture frame involves choosing the right position, measuring accurately, and securing suitable wall fixings. This article on voguecultures.co.uk provides informational guidance only, helping readers hang frames safely and keep them straight.
Quick Guide
| Hanging Method | Best For | Important Tip |
| Sawtooth hanger | Small, lightweight frames | Use a compatible picture hook. |
| Picture wire | Frames fitted with secure wire | Measure the wire’s hanging drop. |
| Two wall hooks | Frames with two back fittings | Keep both fixing points level. |
| Adhesive strips | Suitable lightweight frames | Follow surface and weight limits. |
| Screws and anchors | Heavier frames | Match fixings to the wall material. |
| Masonry fixings | Brick or concrete walls | Use suitable plugs and drill bits. |
How to Hang a Picture Frame: Quick Steps
- Choose the position: Decide where the picture looks balanced on the wall.
- Check the hardware: Identify the wire, D-rings, sawtooth hanger, or back hooks.
- Measure accurately: Mark the desired frame position and calculate the hanging drop.
- Select the fixing: Choose a hook, screw, or anchor suitable for the wall and frame weight.
- Install securely: Check for hidden cables and pipes before drilling or hammering.
- Hang and level: Place the frame on its support and check it with a spirit level.
Find the Best Spot for Your Picture Frame
Before choosing a fixing, stand back and look at the wall. A picture usually looks best when it relates to something nearby, such as a sofa, sideboard, or reading chair.
A useful starting point is to place the centre of the artwork about 57–60 inches (145–152 cm) above the floor. This is an eye-level guideline, not a strict rule. You may need a lower position in a seated area, or a different height for a tall picture or a room with unusual proportions.
Above a sofa or sideboard, try leaving roughly 6–8 inches (15–20 cm) between the furniture and the bottom of the frame, then judge how it looks. Make sure the picture does not interfere with people sitting down or moving around. Avoid hanging a heavy frame over a bed unless its mounting is designed and professionally assessed for that situation.
To test a position without making holes, hold the frame against the wall or tape up a piece of paper cut to the same size.
Gather the Tools and Picture Hanging Kit
Most small frames need only a tape measure, pencil, spirit level, and an appropriate picture hook or screw. Painter’s tape can help with marking, while a hammer or screwdriver may be needed for the chosen fixing. If you are drilling, use the correct drill bit, eye protection, and a detector suitable for checking the wall for hidden services.
A typical picture hanging kit may include picture hooks, small nails, screws, wire, and fittings for the back of a frame. For example, a short picture nail intended for a lightweight frame is not a replacement for a properly rated masonry fixing.
Check the complete frame’s weight, including its glass, before selecting anything. Read the load rating and installation instructions for both the wall fixing and the fitting attached to the frame. Choose hardware compatible with the wall material rather than simply using the largest item in the kit.
Check the Hanging Hardware on the Back of Your Frame
Turn the frame over on a clean, soft surface. Look near the upper part of the backing for the fitting that will actually carry its weight.
A picture wire runs between two secure attachment points, often D-rings, on opposite sides. A sawtooth hanger is a short metal strip with notches that catches on a suitable nail or hook. Some frames have two D-rings or fixed loops designed to hang directly on separate wall supports, without using wire.
Check that the fittings are firmly attached to sound parts of the frame. Loose screws, frayed wire, bent brackets, or a weak backing board should be addressed before hanging. Do not rely on thin cardboard or decorative trim to hold the load.
If the frame has no hardware, choose a hanging system recommended for its construction and weight. Fit it to a strong section of the frame, following the fitting manufacturer’s directions. For a delicate or valuable frame, ask a professional framer to install suitable hardware.
Choose the Right Wall Hooks, Nails, or Screws
The best wall support depends on more than whether a picture feels light or heavy. Consider its total weight, width, type of hanger, wall material, and whether the wall is in good condition.
On sound plasterboard, a properly rated picture hook may work for a small, lightweight frame when installed exactly as directed. Heavier pieces usually need a fixing attached to a wooden stud or a suitable plasterboard anchor. Brick and concrete usually require compatible masonry screws or wall plugs rather than ordinary picture nails.
Always follow the stated load limit for the whole hanging arrangement, not just one hook. Do not assume that two supports automatically double a manufacturer’s rating. Before making holes, check for hidden electrical cables and pipes with a suitable detector and consider likely cable routes near sockets and switches. A detector is not a guarantee; if the location is uncertain, choose another spot or consult a qualified tradesperson.
Measure and Mark the Wall for Accurate Placement
The most common measuring mistake is placing the nail where the top of the frame should be. The hanging point is usually lower, so doing this leaves the picture too low. A simple measurement called the drop solves the problem.
First, decide where the frame’s top centre should sit and make a light pencil mark or use painter’s tape. Next, turn the frame over. If it has wire, pull the wire upward until it is taut in the position it will take when supported. Measure the distance from the wire’s highest resting point to the frame’s top. With a sawtooth hanger or a fixed back hook, measure from the part that rests on the wall support to the top edge.
Measure that drop downward from your top-edge mark. The result is the wall support’s resting position. Remember that on some picture hooks, the nail hole is higher than the small ledge holding the frame; position the hook so that its ledge, not its nail, meets your mark.
For another way to check your height, imagine a 40 cm-tall frame whose centre should be 150 cm from the floor. Its top will be at 170 cm. If the hanging point is 5 cm below that, the support point belongs at 165 cm.
How to Hang a Picture Frame on a Wall: Step by Step
Once you have chosen the position and measured the drop, the actual hanging process should be straightforward.
Inspect the wall for cracks, loose paint, or damaged plaster. Use a suitable detector before drilling or hammering, and move your mark if there is any sign of a hidden cable or pipe. Hold the frame or paper template in place one last time to confirm its height and alignment.
Next, install the fixing specified for your wall and the frame’s weight. A rated picture hook might need small pins tapped in at the angle shown on its package. A screw into a stud or masonry plug must be installed according to its instructions. For an anchor, follow the maker’s guidance on hole size, wall thickness, and tightening. Never force a fixing into a crumbling surface.
Now lift the frame and lower its wire, sawtooth hanger, or back fitting onto the support. Make sure the hardware has actually caught rather than sitting loosely against the wall. Keep a hand on the frame as you gently test its stability. Place a spirit level along its top edge, then adjust the frame slightly until it is straight.
If it seems too high or low, recheck the measurements before adding another hole.
How to Hang a Picture Frame With Sawtooth Hangers
Sawtooth hangers are common on smaller wooden frames. Their small teeth catch on a suitable nail or hook and allow slight sideways adjustment. Start by checking that the hanger is fitted securely and is rated for the complete frame.
Find the hanger’s centre and measure its hanging point down from the top of the frame. Mark the intended top centre on the wall, then transfer that drop downward. Fit the recommended wall fixing at the correct position, remembering that a picture hook’s nail hole may not be its resting point.
Lower the sawtooth carefully onto the support and check that a tooth has caught securely. Use a spirit level to straighten the frame. If it leans to one side, lift it off and reseat it rather than dragging the teeth across the wall. For large frames or two sawtooth fittings, use the mounting arrangement specified by the manufacturer.
How to Hang a Picture Frame With Wire
Wire makes it easy to hang many framed pictures from a suitable hook, but its condition matters. Check both attachment points, the wire’s stated strength, and any signs of fraying or stretching.
To work out the hanging height, lift the wire towards the upper edge as though a hook were pulling on it. Measure from the wire’s highest point to the top of the frame. Transfer that measurement down from the wall mark, then position the wall hook’s resting point there.
For a wider picture, a two-hook arrangement may help it stay steady if the wire and fixings are designed for that use. Follow the hardware instructions rather than guessing how the weight will be shared. After placing the wire over the hook or hooks, check that it sits securely, then straighten the frame with a level. Small protective pads on the lower corners can reduce marks and help prevent movement.
Hanging a Picture Frame With Back Hooks or Two Wall Hooks
Some frames have two D-rings, loops, or keyhole fittings intended to sit directly on two wall supports. Both supports must line up, so accurate spacing is essential.
Measure the distance between the centres of the two hanging points on the back of the frame. Also measure how far each one sits below the top edge. Mark the desired top centre on the wall and use the measurements to mark two support positions, equally spaced around the centre where appropriate. A spirit level helps make sure the marks sit at the correct height.
A simple painter’s-tape trick can help: put a strip of tape across the back, mark each fitting’s position on it, then move the tape to the wall and level it. Install compatible fixings for both positions and lower the frame carefully onto them.
If you are learning how to hang a picture on a wall with 2 hooks, avoid using wire measurements for a pair of fixed back hooks. Their separate attachment points need to meet the wall supports directly and evenly.
How to Hang a Picture Frame Without Nails or Holes
For renters or anyone who wants to avoid drilling, removable picture-hanging strips can be useful. They are generally intended for certain smooth, clean, firmly painted surfaces and lightweight frames. They do not work equally well on every wall, and removal is not guaranteed to leave delicate paint undamaged.
First, check the strip manufacturer’s instructions for the maximum frame weight, size, surface type, temperature, and preparation steps. Some products require the paint to have cured for several days. Others specify cleaning with rubbing alcohol, pressing the adhesive firmly, removing the frame temporarily, and waiting before rehanging it. Follow the exact instructions on your particular pack.
Avoid putting adhesive strips on wallpaper, dusty plaster, textured brick, loose paint, or damp walls unless the product specifically permits that surface. Do not use them for valuable, fragile, or heavy frames, or above beds, when the maker warns against it. A fall can damage more than the wall.
An existing, safely secured picture rail or ledge also avoids making new holes.
Hanging Heavy Picture Frames on Different Wall Types
A heavy frame needs extra care because glass, wide dimensions, and movement can put considerable force on its fittings. Do not choose a fixing by weight alone. If you cannot establish a safe mounting method, ask a professional installer.
Plasterboard: These walls often have an empty space behind the board. A small picture may be suitable for a rated plasterboard hook, while heavier frames may need a secure wooden stud or an anchor designed for the board’s type and thickness. Toggle-style fixings can provide support in some hollow walls, but only when installed correctly and within their stated limits. Do not rely on ordinary screws driven into unsupported plasterboard for a heavy picture.
Traditional plaster: Older plaster can crack or loosen, particularly over wooden laths. Check its condition and use fixings appropriate to the underlying construction. Work gently when drilling, and stop if the surface starts breaking away. Locating a sound structural support is often preferable to trusting weak plaster.
Brick or concrete: Solid masonry typically needs a suitable masonry drill bit and correctly matched plugs, anchors, or screws. Check for hidden services first and follow the fixing’s specified hole diameter and depth. Avoid loose mortar or damaged bricks unless your chosen system is explicitly designed for them.
Before lifting a large frame, check that its corners, glass, and hanging attachments are secure. Have another person help with positioning when needed. Once fitted, confirm that both supports are engaged and the frame cannot easily be knocked free.
Common Picture Hanging Mistakes and How to Fix Them
A crooked picture is often caused by uneven fixing points, a wire that has shifted, or a frame that was not levelled after hanging. Start by checking it with a spirit level. If the support is correct, a small adjustment may be enough. With two hooks, however, you may need to remove the frame and recheck their heights rather than forcing it straight.
If a frame leans forward, inspect its hanging fittings and make sure the wall support is appropriate. Small felt pads on the lower rear corners sometimes help the frame rest more evenly, but they cannot fix an unsafe or loose fastening.
A picture that hangs too low often means the drop was forgotten or measured without pulling the wire taut. Measure again from the frame’s actual resting point before relocating the support. If a nail or anchor moves in the wall, take the picture down immediately and replace it with a correctly installed fixing in sound material.
Use paper templates, mark lightly, and check the wall and frame measurements twice.
Conclusion
Learning how to hang a picture frame is mostly about getting a few small details right. Choose a position that suits the room, identify the fittings on the frame, and measure from the real hanging point rather than guessing where the nail should go. Above all, use wall fixings that suit both the surface and the picture’s weight.
Whether you use a sawtooth hanger, wire, two back hooks, or approved removable strips, take time to follow the installation instructions. A final check with a spirit level and a gentle stability test will help your picture look balanced and stay securely in place.
Frequently Asked Questions
What is the ideal height for hanging a picture frame?
The centre of a picture frame is commonly placed 57–60 inches above the floor. However, the ideal height depends on the room layout, furniture position, and viewing comfort.
Can I hang a picture frame without making holes?
Yes, removable picture-hanging strips can hold certain lightweight frames without nails or drilling. Check the manufacturer’s weight limits and surface requirements, as they may damage paint or fail on unsuitable walls.
How do I hang a picture frame with wire?
Pull the picture wire upward until taut, measure its distance from the frame’s top, and transfer that measurement to the wall. Install a suitable hook and carefully hang the frame.
How do I hang a picture frame using two hooks?
Measure the distance between the frame’s two back fittings and transfer those positions onto the wall. Keep both marks level, install suitable fixings, and carefully attach the frame.
What is the safest way to hang a heavy picture frame?
Heavy frames need appropriately rated wall fixings, ideally secured to suitable structural supports where possible. Check the wall material, total frame weight, and hardware instructions before installation.
Disclaimer: This article on voguecultures.co.uk is published solely for general educational and informational purposes. It explains picture frame hanging methods and does not provide professional installation services or personalised structural advice. This content is not a guest post, paid promotion, sponsored article, or advertisement. The information is intended to help readers understand safe picture hanging practices. Wall conditions, frame weights, and fixing requirements vary. Always follow manufacturer instructions, check for concealed electrical cables and pipes, and consult a qualified professional when handling heavy frames or uncertain wall conditions.
Enjoyed this article? Discover more helpful ideas and fresh inspiration on Vogue Cultures.