Learning how to reseal windows can help you solve small but frustrating problems such as cold drafts, minor water entry, insects, outside noise, and gaps around the window frame. Over time, window sealant can dry out, shrink, crack, or pull away from the surface. Changes in temperature, sunlight, rain, building movement, and normal aging can all weaken the original seal.
Resealing usually means removing damaged caulk from the fixed joints around a window and replacing it with fresh sealant. It does not normally mean opening the sealed glass unit or repairing the hidden seal between two panes of glass.
Fresh caulk can close gaps between a window frame and nearby siding, brick, trim, or interior wall material. Weatherstripping performs a different job: it seals the movable parts of windows and doors. The U.S. Department of Energy recommends caulk for cracks between stationary building parts and weatherstripping for components that open and close. de explains how to inspect your windows, select the right sealant, remove old caulk, prepare the surface, and apply a neat new bead. It also explains when resealing is enough and when a damaged window may need professional repair or replacement.
Quick Guide Table
| Area | Best Material | Main Purpose |
| Exterior frame gaps | Exterior silicone or polyurethane | Blocks rain, moisture, and outdoor air |
| Interior trim gaps | Paintable acrylic-latex caulk | Seals drafts and creates a neat finish |
| Moving window parts | Weatherstripping | Stops air leaks without restricting movement |
| Wide or deep gaps | Backer rod with sealant | Supports the caulk and fills larger joints |
| Fog between glass panes | Professional glass repair | Perimeter caulk cannot repair a failed glass seal |
Step-by-Step Guide to Resealing Windows
- Inspect the window and find cracked, loose, or missing caulk.
- Cut and remove the old sealant with a utility knife and scraper.
- Clean away dust, grease, mildew, and leftover residue.
- Let the joint dry completely before applying new material.
- Apply painter’s tape along both sides of the gap.
- Cut the sealant nozzle at a 45-degree angle.
- Apply one steady bead that touches both adjoining surfaces.
- Smooth the sealant and remove the tape while it is still wet.
- Allow the product to cure fully before exposing it to rain or paint.
- Keep drainage holes, tracks, and moving window parts clear.
Signs Your Windows Need to Be Resealed
The clearest warning sign is damaged caulk around the window. Look for cracks, peeling edges, separated sections, hard and brittle material, or places where the sealant is completely missing. A gap may be very small but still allow air or water to enter.
Cold air around the frame is another common clue. On a cool or windy day, slowly move your hand around the fixed edges of the window. A noticeable temperature change may reveal an air leak. Do not confuse this with the natural cool feeling that can come from touching cold glass.
Check the wall, sill, and trim for damp patches, peeling paint, stains, or swollen wood. These signs may indicate that rainwater is entering around the frame. However, water can travel from another part of the wall or roof, so the nearest gap is not always the real source.
You may also notice more outdoor noise, dust, insects, or uneven room temperatures. Inspect both sides of the window in good daylight. Outside, examine the joints where the frame meets siding, brick, render, or trim. Inside, check the edges of the casing, sill, and wall.
Can You Reseal Windows Instead of Replacing Them?
You can often reseal windows instead of replacing them when the main problem is cracked caulk, a small frame gap, or worn weatherstripping. If the glass is sound, the frame is stable, and the window still opens, closes, and locks correctly, a careful resealing job may restore comfort and improve protection from the weather.
Replacement may be necessary when the frame is badly rotten, warped, cracked, or pulling away from the wall. Broken glass, damaged hardware, serious water damage, and repeated leaks after proper repairs can also point to a larger problem.
It is especially important to identify where condensation appears. Moisture on the room-facing surface of the glass may be related to indoor humidity. Fog trapped between the panes of a double- or triple-pane window is different. It usually indicates that the seal around the insulated glass unit has failed and allowed moisture into the space between the panes. Applying caulk around the outer frame will not rebuild that internal seal. the age and overall condition of the window before spending time on repairs. Resealing is useful for local gaps, but it cannot correct every structural, glass, or installation problem.
Tools and Materials Needed for Window Resealing
Most homeowners can reseal a basic window with a small collection of hand tools. You will need a caulking gun that fits your sealant cartridge, a sharp utility knife, a putty knife, and a scraper. A plastic scraper is safer than a metal blade on vinyl, painted aluminum, or other surfaces that scratch easily.
Keep clean cloths, a soft brush, a vacuum, painter’s tape, and a suitable surface cleaner nearby. Rubbing alcohol may help remove light grease or residue from some hard surfaces, but first check that it will not damage the frame’s finish. The joint must be clean and completely dry before new caulk is applied.
Wear work gloves and eye protection, especially while cutting old sealant. A caulking tool can help shape the bead, although a gloved finger may work for products whose instructions allow that method.
For narrow joints, sealant alone may be enough. A deeper or wider gap may need foam backer rod before caulking. Backer rod fills part of the empty space, supports the bead, and helps control how much sealant enters the joint. Department of Energy guidance also identifies backer rod with caulk as an option for gaps around window and door framing. oosing the Right Sealant for the Job
The best sealant depends on the location, surface materials, joint movement, weather exposure, and whether the finished bead needs to be painted.
For exterior window frames, choose a product clearly labelled for exterior window and door use. High-quality 100% silicone is flexible and resistant to sunlight, moisture, and temperature changes. Neutral-cure silicone is often suitable for a wide range of building materials, but compatibility still varies by product.
Polyurethane sealant is another durable exterior option. It forms a strong bond and can work well on masonry, wood, metal, and other surfaces when the label approves them. Some polyurethane products are paintable, but they may be harder to apply and clean than acrylic caulk.
For interior trim, paintable acrylic-latex or siliconized acrylic caulk is usually easier to tool and decorate. It works best in protected indoor joints rather than areas exposed to constant rain.
Never choose a product by the word “caulk” alone. Read the cartridge and confirm that it is suitable for the exact surfaces, such as glass, brick, vinyl, painted wood, aluminum, or concrete. Window-grade silicone products are available for glazing and exterior weather sealing, but application temperatures and curing conditions differ between formulas. n You Reseal Windows Without Removing Old Caulk?
Many people ask how to reseal windows without removing the old material. In most cases, covering damaged caulk with a new layer is not a reliable repair. New sealant needs a clean, stable surface. If the old bead is loose, dirty, cracked, wet, or pulling away, the new material will be attached to a weak base.
Layering caulk can also hide water, mold, and damaged wood. The repair may look better for a short time but separate again after movement or changing weather. A thick, uneven bead can trap dirt and make future removal more difficult.
A very small repair may be possible when the remaining caulk is fully bonded, clean, dry, and compatible with the new product. Even then, follow the sealant manufacturer’s instructions because some materials do not bond well to cured caulk, especially when the existing product type is unknown.
For the most dependable result, remove the entire failed section rather than cutting out only the most visible crack. Expose both sides of the joint, clean away residue, and let the surfaces dry. This takes longer at the beginning, but it gives the new bead a much better chance of forming a lasting seal.
How to Reseal Windows at Home: Preparation Steps
Before starting exterior work, choose a dry day and check the weather forecast. The surface should remain dry during application and for the period stated on the cartridge. Do not assume that every sealant has the same temperature limits or curing time. One window-grade silicone, for example, lists an application range of 5°C to 40°C, while other specialist products may have different limits. Always follow the instructions for the exact product you purchased. the whole window before removing anything. Look at the upper edge, lower corners, side joints, trim, sill, flashing, siding, and nearby wall. If water is entering from above, replacing a lower bead may not solve the leak.
Protect the glass and surrounding finishes. Place a dust sheet indoors, and use painter’s tape where necessary. Make sure the window is closed and locked so the frame sits in its normal position.
Confirm whether the problem is in a fixed joint or a movable section. Fixed frame gaps are normally sealed with caulk. Gaps around an opening sash may require weatherstripping instead. Check the window manufacturer’s care and installation information before sealing unfamiliar openings or channels.
Removing and Cleaning the Old Window Seal
Use a sharp utility knife to cut carefully along both sides of the failing caulk bead. Keep the blade angled away from the frame and glass. Once the edges are free, lift the material with a putty knife and pull it out in strips.
Work slowly around vinyl or aluminum windows. A metal tool can leave scratches that remain visible after the repair, so use a plastic scraper whenever possible. Do not force a blade into hidden joints or behind flashing.
After removing the main bead, scrape away small pieces of residue. Brush or vacuum loose dust and dirt. Clean mildew with a suitable cleaner that is safe for the frame material. Never mix bleach with ammonia, alcohol, vinegar, or other cleaning products.
Wipe the joint with a clean cloth. Rubbing alcohol can be used on some nonporous surfaces to remove light grease, but test it in a hidden area and follow the window manufacturer’s cleaning advice. Do not soak unfinished wood or allow liquid to enter the wall.
The joint must be fully dry before caulking. Moisture, dust, oil, and loose paint can weaken the bond. If the wood is soft, rotten, or still wet after a dry period, stop and investigate the source before covering it.
Applying a Smooth, Weatherproof Bead
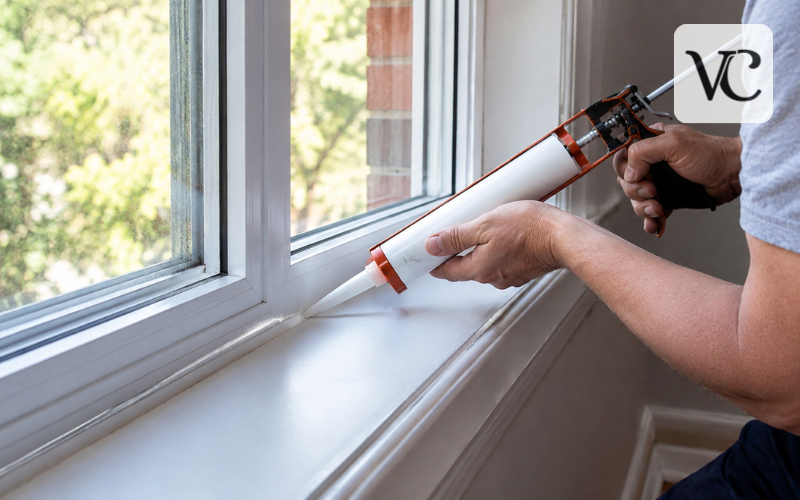
Apply parallel strips of painter’s tape along the edges of the joint if you want a straight, controlled line. Leave enough space for the sealant to touch both surfaces. Tape is especially helpful for beginners and around visible interior trim.
Cut the cartridge nozzle at roughly a 45-degree angle. Begin with a small opening because you can enlarge it if needed. The hole should be close to the width of the joint. Puncture the inner seal, load the cartridge into the caulking gun, and test the flow on scrap cardboard.
Place the nozzle against the joint rather than holding it far above the gap. Apply steady pressure while moving at an even speed. The bead should contact both sides and fill the opening without creating large lumps or empty sections.
Smooth the sealant immediately with a caulking tool or another method approved by the manufacturer. Use light, continuous pressure. For exterior joints, shape the surface so water does not sit on the bead.
Remove painter’s tape while the sealant is still wet. Pull it away slowly without dragging it across the fresh line. Leave the window undisturbed for the stated curing period. “Dry to the touch” does not always mean fully cured.
How to Reseal Windows Outside
When learning how to reseal windows outside, pay close attention to water management. Inspect where the frame meets brick, siding, exterior trim, render, or another wall finish. Upper joints and corners receive heavy weather exposure, but lower sections may contain designed drainage paths.
Do not cover weep holes. These are small exterior openings that allow water to drain from parts of the window system. Andersen describes weep holes as openings placed on the exterior of a window or door for water drainage. Blocking them with sealant can trap moisture inside the frame. aling over flashing gaps, drain channels, movable tracks, hardware, or removable covers unless the window manufacturer specifically instructs you to do so. If you cannot identify an opening, check the product manual before applying caulk.
Create a neat bead with full contact on both sides of the joint. Pay special attention to changes in material, such as where vinyl meets brick, because the materials may move differently as temperatures change.
Allow the product to cure for the full recommended time before exposing it to rain, washing, or paint. Some sealants develop a surface skin quickly but need much longer to cure through the whole bead.
How to Reseal Windows Inside
Interior resealing is mainly used to close small air gaps around fixed trim, casing, window ledges, and the joint between the frame and finished wall. Use a paintable interior caulk if the bead will be covered with paint.
Remove loose material and clean the joint in the same way you would outside. Protect wallpaper, painted walls, flooring, and curtains before you begin. Apply a narrow bead rather than filling the area with excess caulk. A smaller, properly placed line usually looks better and is easier to decorate.
Do not caulk moving parts, sash tracks, locks, hinges, balance systems, or spaces needed for normal operation. Open and close the window before applying sealant so you understand which areas move.
Some air leaks may come from the rough opening between the window jamb and the wall framing rather than the visible trim edge. If the trim can be removed without damage, that deeper gap may require backer rod, suitable caulk, or low-expansion window and door foam. Government air-sealing guidance recognizes these methods for gaps around window and door framing. table caulk dry for the period stated on the label before priming or painting.
How to Reseal Window Panes and Glass Edges
Resealing a window frame is not the same as resealing the edge of a pane. Frame caulk closes the joint around the installed window. Glazing putty or glazing sealant holds and seals glass within a sash.
Older single-pane wood windows may use traditional glazing putty. Cracked or missing putty can allow the pane to loosen and water to reach the wood. Repair often involves carefully removing loose putty, securing the glass correctly, preparing the wood, and applying new glazing material. This work requires care because old glass may be thin and easy to break.
Modern windows may use glazing beads, gaskets, tapes, or specialist silicone systems. Do not remove these parts without the correct instructions. Some sealants can react poorly with coated glass, spacers, gaskets, or existing glazing materials.
If the pane is cracked, loose, or difficult to reach safely, call a glazing professional. The same applies to fogging between insulated panes. A perimeter bead around the frame cannot remove trapped moisture or restore the lost insulating gas. The glass unit may need to be replaced even when the surrounding frame can remain.
Sealing Windows and Doors Against Cold Air
To seal windows from cold air, first find the actual leak. Inspect fixed frame joints, movable sashes, door edges, locks, thresholds, and trim. On a windy day, you may feel for drafts with your hand, but avoid using an open flame near curtains, sealants, or painted surfaces.
Use caulk on fixed cracks between stationary parts. Use weatherstripping where a window sash or door moves against its frame. This distinction helps prevent leaks without gluing the unit shut or blocking drainage. compressed, torn, or missing weatherstripping with a type suitable for the window or door. The material should make light contact when the unit closes but should not make it difficult to lock.
Doors may also leak at the bottom. A properly fitted sweep or threshold seal can help, although it should not scrape so heavily that the door becomes hard to use.
After the repair has cured, close and lock each window and door, then check again during cool or windy weather. If drafts continue, the leak may be hidden behind trim, within the wall opening, or caused by a damaged frame or poor installation.
Conclusion
Knowing how to reseal windows properly is mostly about preparation. Remove failing caulk instead of hiding it, clean and dry the joint, choose a sealant made for the location and surface, and apply a smooth bead that touches both sides of the gap. Follow the product’s temperature and curing instructions rather than relying on one general drying time.
Use caulk only on fixed joints. Weatherstripping is the better choice for moving window and door parts. Never cover weep holes, drainage channels, tracks, locks, or other parts needed for safe operation.
Resealing can be a practical way to reduce drafts, minor moisture entry, outdoor noise, and insect gaps without replacing the whole window. However, it cannot repair broken glass, serious frame decay, faulty installation, or a failed seal inside a double-pane unit.
Fog or moisture trapped between panes usually means that the insulated glass seal has failed. Damaged glass, rotten frames, repeated leaks, and difficult upper-floor work should be assessed by a qualified window or glazing professional. A careful diagnosis will help you choose the right repair and avoid covering a larger problem with a temporary bead of caulk.
Frequently Asked Questions
Can you reseal windows without removing old caulk?
New caulk should not normally be applied over loose or cracked material. Removing the damaged sealant creates a clean surface and helps the fresh bead bond properly and last longer.
What is the best sealant for exterior windows?
A weatherproof exterior silicone or polyurethane sealant is usually suitable. Check the product label to confirm that it works with your window frame, glass, brick, siding, or surrounding trim.
Can resealing windows stop cold air?
Resealing fixed gaps around a window frame can reduce cold drafts. Use weatherstripping instead of caulk around movable sashes because it seals the opening without preventing normal window operation.
Can foggy double-pane windows be resealed with caulk?
No. Fog trapped between two panes usually means the insulated glass seal has failed. Adding caulk around the frame will not remove the moisture or restore the internal glass seal.
How long should window sealant dry?
Drying and curing times vary by product, temperature, humidity, and bead thickness. Always follow the instructions on the cartridge before painting, washing, opening the window, or exposing it to rain.
Disclaimer: This guide provides general information for basic window resealing and minor air or moisture gaps. Sealant types, application conditions, and window designs vary, so always follow the product and window manufacturer’s instructions. Seek professional help for broken glass, rotten frames, serious water damage, upper-floor windows, repeated leaks, or condensation trapped between insulated glass panes.
Enjoyed this article? Discover more helpful ideas and fresh inspiration on Vogue Cultures.