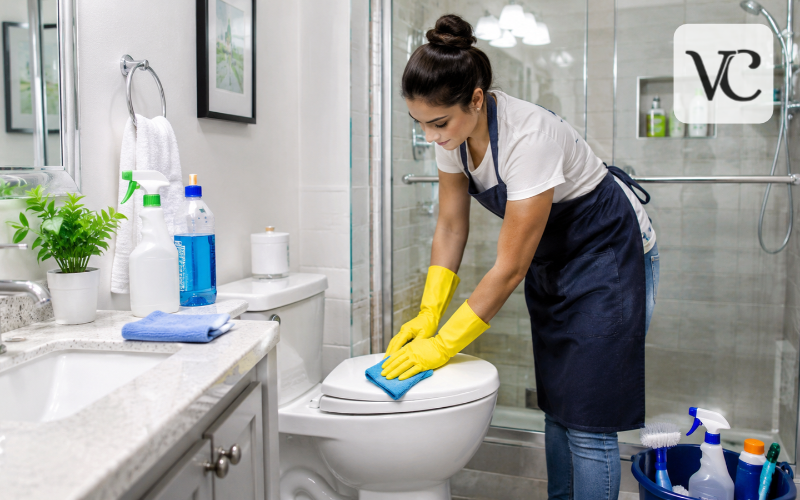
A bathroom can look tidy and still have dirt hiding around taps, behind the toilet, and along shower door tracks. Everyday cleaning usually means wiping the sink, cleaning the toilet, and giving visible surfaces a quick once-over. Deep cleaning goes further. It removes the soap scum, limescale, dust, and built-up grime that regular wipe-downs often miss.
Learning how to deep clean bathroom does not mean scrubbing everything at once or buying a cupboard full of products. The easier approach is to work from high areas to low ones and remove loose dust and hair before getting surfaces wet. This prevents dirt from spreading and helps you avoid cleaning the same place twice.
The steps below take you through the whole room, including the less obvious areas, with simple ways to protect your bathroom surfaces while you clean.
Snippet-Ready:
Deep cleaning a bathroom means thoroughly removing dirt, soap scum, limescale, and grime from surfaces and hidden areas. Voguecultures.co.uk provides informational guidance only about how to deep clean a bathroom safely and effectively.
Bathroom Deep Clean Quick Guide Table
| Bathroom Area | Recommended Cleaning Method | Important Tip |
| Bathroom Walls | Wipe with a soft cloth and suitable mild cleaner | Avoid soaking painted walls |
| Shower and Bathtub | Use a non-abrasive bathroom cleaner and soft sponge | Rinse and dry thoroughly |
| Tiles and Grout | Clean with a suitable tile cleaner and soft brush | Avoid acidic products on natural stone |
| Shower Glass | Use a compatible glass cleaner and microfibre cloth | Buff dry to prevent water spots |
| Sink and Taps | Wipe with a surface-safe cleaner | Pay attention to tap bases |
| Toilet | Clean the bowl and exterior with appropriate products | Use separate cloths and follow disinfectant labels |
| Bathroom Doors | Wipe handles, frames, and washable surfaces | Keep excess moisture away from wood |
| Bathroom Floor | Sweep and mop with a floor-safe cleaner | Allow the floor to dry completely |
| Mould-Prone Areas | Clean small affected hard surfaces safely and control moisture | Seek professional help for extensive mould |
How to Deep Clean a Bathroom Step by Step
- Prepare the bathroom: Remove towels, toiletries, bath mats, and unnecessary items.
- Remove dust and hair: Dust high surfaces and vacuum the floor before wet cleaning.
- Clean the walls and tiles: Use suitable cleaning products to remove dirt and surface marks.
- Scrub the shower and bathtub: Remove soap scum and grime using a non-scratch sponge.
- Clean the sink and toilet: Focus on taps, drains, toilet hinges, and hidden corners.
- Wipe doors and fixtures: Clean handles, mirrors, shelves, and frequently touched surfaces.
- Wash the bathroom floor: Mop from the farthest corner towards the doorway.
- Dry and organise: Allow surfaces to dry, improve ventilation, and return clean bathroom items.
Bathroom Deep Clean Checklist Tools and Cleaning Products You Need
Gather everything before starting so you do not have to stop halfway through. Useful tools include several microfibre cloths, non-scratch sponges, a soft-bristled brush, an old toothbrush for narrow gaps, rubber gloves, a bucket, a mop, and a vacuum or broom. Keep one cloth and sponge just for the toilet, and use different ones for the sink and other surfaces.
For products, start with a mild bathroom or all-purpose cleaner suitable for the material you are cleaning. You may also need a toilet bowl cleaner, glass cleaner, washing-up liquid, and a limescale remover approved for particular surfaces. A pH-neutral product is often a safer choice for natural stone, but always follow the stone supplier’s advice. Stronger is not automatically better, and abrasive powders can scratch delicate finishes.
Open a window or run the extractor fan for ventilation. Read the labels, wear gloves when directed, and follow any instructions about rinsing and contact time. Never mix cleaning chemicals, particularly bleach with acids, vinegar, ammonia, or toilet cleaners. Use one product at a time and rinse as directed before switching products.
Prepare Your Bathroom Before Deep Cleaning
Start by taking towels, bath mats, toiletries, bins, and movable storage out of the room. Put washable fabrics aside for laundering, and check products before returning them later. Clear countertops and shower ledges so you can reach the areas where bottles normally sit.
Next, work on dry surfaces. Dust ceiling corners, reachable light fittings, window ledges, shelves, and the outside of extractor fan covers. Use a soft duster or vacuum attachment and avoid spraying liquids near electrical fittings. If the fan cover needs removing, follow the manufacturer’s instructions and turn off the power first.
Finally, sweep or vacuum the dry floor, including around the toilet and behind the door. Collecting hair and dust before using water makes the rest of the job much less messy. Once this preparation is finished, you can apply appropriate cleaners to stubborn deposits and let them work for the time stated on their labels while you tackle another area.
How to Deep Clean Bathroom Walls and High Surfaces
Bathroom walls collect more than splashes. Steam can leave marks around the bath, while dust gathers above cupboards and along ceiling edges. Before wiping a wall, check what it is made from and test your cleaner on a small, hidden spot.
For washable painted walls, lightly dampen a soft cloth with water and a little mild cleaner if the paint finish permits it. Wipe gently rather than soaking the paint, then dry it. Waterproof wall panels may need a different product, so check their care instructions. Tiled walls can usually be wiped with a cleaner suited to the tile and grout material.
Pay attention to the areas around towel rails, behind exposed pipes, and above the shower screen. Remove loose dust from extractor grilles without pushing dirt into the fan. Keep water away from sockets, switches, and light fittings. If paint is peeling or dark marks return quickly, investigate the moisture problem instead of repeatedly scrubbing the surface.
Deep Clean Your Bathroom Shower and Bathtub
The shower and bath often need the most attention because soap, body oils, and minerals from water collect there. Begin by removing shampoo bottles, shower caddies, and anything sitting on the edges. Check whether your bath and shower tray are acrylic, enamelled, fibreglass, or another material before choosing a cleaner.
Apply a suitable non-abrasive product to the shower walls, bath sides, and tray. Allow it to sit only as long as the label recommends. Then use a soft sponge or brush to loosen soap scum, concentrating on corners, around the drain cover, and where the bath meets the wall. Avoid harsh scourers that can dull or scratch surfaces. For textured shower trays, a soft brush can reach dirt in the grooves without damaging the finish.
Rinse thoroughly with clean water, especially where anyone might stand barefoot. Wipe down taps and the bath edge, then dry the surfaces with a clean cloth or squeegee. Look at the sealant as you work: cracked or lifting sealant needs repair, not more vigorous scrubbing.
How to Deep Clean Bathroom Tiles and Grout
Tiles are generally straightforward to wipe, but grout lines are more porous and often hold onto dirt. Start by removing surface dust, then apply a cleaner that is safe for both the tile and its grout. Use a soft cloth on the tile faces and a small, soft-bristled brush along stained grout lines. Avoid metal brushes and hard scraping tools, which may damage grout or the glazed finish.
Ceramic and porcelain tiles often tolerate ordinary tile cleaners, although the manufacturer’s guidance still matters. Natural stone, including marble and limestone, needs more care. Acidic products such as vinegar and many limescale removers can etch stone, leaving dull patches that cleaning cannot fix. Choose a suitable stone cleaner instead.
Rinse away loosened dirt and cleaner residue, then dry the area. If grout is cracked or missing, arrange repairs to stop water getting underneath. Dark marks that keep returning may signal ongoing dampness rather than a simple dirty-grout problem. Cleaning the tile is useful, but controlling moisture is what helps keep the lines looking better for longer.
Clean Shower Doors, Glass Screens, and Showerheads
Glass screens make water spots easy to see. Apply a glass or shower-screen cleaner that is compatible with the coating and surrounding fittings, then wipe with a soft cloth. Work across the glass in overlapping strokes and buff it dry. Avoid abrasive pads or sharp scraping tools, especially on treated glass.
Shower door tracks and the bottoms of frames can trap hair, soap residue, and stagnant water. Lift out loose debris with a small brush or cloth, clean accessible grooves, and dry them afterward. Wipe handles and rubber seals carefully. If a seal is torn or badly discoloured, replacing it may be more effective than repeated cleaning.
If the showerhead sprays unevenly, check for mineral deposits around its nozzles. Some models have flexible nozzles that can be gently rubbed clean; others allow a removable part to be descaled. Follow the manufacturer’s instructions rather than automatically soaking the whole showerhead in vinegar, which can damage some finishes or internal parts.
Deep Clean the Bathroom Sink, Taps, and Vanity
Remove toothbrush holders, soap dishes, and other items from the sink area. Wipe loose dust away, then clean the basin with a product suitable for its finish. Work around the plughole and overflow opening, where toothpaste and soap residue often collect. A soft toothbrush can help around tap bases and joins, but do not force it into delicate seals.
Wipe taps with a damp microfibre cloth and dry them to reduce water marks. For persistent limescale, use only a remover approved for that particular finish. Some plated, painted, or brushed fittings can be damaged by acids or abrasive cleaners. Clean the mirror with a suitable glass cleaner applied to the cloth rather than spraying heavily near its edges and frame.
Open vanity drawers and cupboards, remove loose items, and wipe the inside surfaces with a lightly damp cloth. Dry shelves before putting anything back. Check under the sink for drips, swollen cabinet material, or musty smells, which may point to a leak that needs fixing.
Clean and Disinfect the Toilet Properly
Begin with the bowl. Apply toilet cleaner according to its instructions, paying attention to the area beneath the rim. Leave it for the labelled time, then scrub the sides and waterline with a toilet brush. Flush when the product directions say to do so. Avoid combining toilet cleaners with bleach or other products, even if stains remain.
For the outside, work from cleaner areas towards dirtier ones: tank, flush button, lid, seat, hinges, and finally the lower sides and base. Use a separate cloth that never touches your sink or shower. Wipe around the seat fixings and behind the toilet where dust and splashes can be overlooked. Clean removable seat parts only as the manufacturer allows.
Cleaning removes visible dirt and many germs. Disinfecting may be useful when someone in the home is ill or extra hygiene is needed, but it is not a substitute for cleaning first. If using a disinfectant, follow its label, including how long the surface must remain visibly wet. Wash your hands after finishing, even if you wore gloves.
How to Deep Clean Bathroom Doors and Hidden Areas
Bathroom doors are easy to overlook because they rarely look particularly dirty. Wipe fingerprints from the handle and around the lock, then clean the door face with a cloth suited to the finish. Use minimal water on wood or painted surfaces, and dry the lower edge, which can collect dampness from wet floors.
Work around the frame, hinges, and skirting boards with a soft brush or cloth. Check the back of the door, cupboard edges, towel rails, and accessible spaces behind the toilet or freestanding storage. A vacuum crevice attachment is useful for hair and dust that gather along narrow gaps. Clean light switches with a barely damp cloth, never a direct spray.
If you have a radiator or heated towel rail, let it cool before cleaning around it. Pay extra attention to corners that stay damp, but do not pull fixed fittings or pipes away from the wall. A thorough deep clean should reach hidden dirt without damaging the room.
How to Deep Clean Bathroom Floors
Once the other surfaces are clean, return to the floor. Pick up any debris that fell while you were working and vacuum or sweep the edges again if needed. Pay attention to the space around the toilet base, under the sink, and behind the door.
Choose a floor cleaner suited to the material. Ceramic tiles may be cleaned with an appropriate diluted floor solution, while natural stone, vinyl, and sealed wood-effect flooring can have different moisture and product limits. Do not flood the floor or leave standing water around joints, grout, or skirting boards. Scrub marks gently with a soft brush rather than a harsh scouring pad.
Start at the farthest point from the doorway and mop backwards towards the exit. Change dirty water when needed so you are not spreading grime. Allow the floor to dry fully before replacing bath mats or walking on it. A dry floor is also less slippery and less likely to develop lingering damp smells.
Remove Stubborn Bathroom Stains, Mould, and Bad Smells
Some bathroom marks need a more targeted approach. White or chalky deposits around taps are often limescale, while sticky build-up on showers is usually soap scum. Use a suitable product for each problem and the surface underneath it. Rust-coloured stains may come from metal fittings or water minerals; identify the source before using a surface-approved rust remover. Avoid aggressive scraping and never mix stain removers.
Mould needs special care. Small patches on suitable hard surfaces may be cleaned using appropriate products, gloves, and good ventilation, followed by thorough drying. Do not brush dry mould into the air. Extensive growth, recurring mould, water-damaged porous materials, or mould linked to leaks may require professional assessment and repair. Replacing deteriorated sealant can sometimes be necessary, but the moisture source must also be addressed.
For bad smells, empty and wash the bin, launder damp mats, and clean accessible drain covers. Check for trapped hair and soap residue, but avoid pouring several drain chemicals down the plughole. Persistent sewer-like smells, slow drainage, leaks, or a strong musty odour can point to a plumbing or ventilation issue. Fixing the cause matters more than covering it with fragrance.
How to Keep Your Bathroom Clean After a Deep Clean
Keeping the results does not require another full scrub every few days. After showers, use a squeegee on glass and tiles where practical, and leave the fan running for the recommended period or ventilate the room safely. Hang towels and mats so they dry between uses, and wipe away splashes before they turn into stubborn deposits.
During the week, give the sink and toilet a regular clean, wipe frequently touched surfaces, and remove loose hair from the floor. Wash bath mats according to their care labels and empty the bin. Check tap bases, sealant, and cabinet interiors occasionally so small leaks or damp patches do not go unnoticed.
How often you need a full bathroom deep clean depends on the number of people using it, water hardness, and how well the room dries. A busy family bathroom may need more frequent attention than a rarely used guest bathroom. Use visible build-up and persistent smells as practical signs that it is time for a more detailed clean.
Conclusion
Knowing how to deep clean a bathroom is mainly about following a sensible order and using the right methods for each surface. Start with clutter and dry dust, work from the walls and fixtures down to the floor, and give neglected corners the attention they need. Rinse products properly, dry wet areas, and deal with leaks or repeated mould rather than simply hiding the symptoms.
A little regular upkeep will help the bathroom stay pleasant between deep cleans. More importantly, it means the next thorough clean should feel manageable instead of becoming an exhausting weekend job.
Frequently Asked Questions
How often should you deep clean your bathroom?
Most bathrooms benefit from a thorough deep clean every few weeks or when visible grime builds up. Bathrooms used by larger households or exposed to high humidity may require more frequent attention.
What is the best product to deep clean a bathroom?
The best product depends on the surface and type of dirt. A mild bathroom cleaner works for many washable surfaces, while toilets, glass, natural stone, and stubborn mineral deposits may require specialised products.
How long does it take to deep clean a bathroom?
A thorough bathroom deep clean may take one to three hours, depending on its size, condition, and level of buildup. Bathrooms with heavy limescale, mould, or neglected corners may take longer.
Can I deep clean my bathroom without using harsh chemicals?
Yes, many bathroom surfaces can be cleaned with mild, surface-compatible products, warm water, and microfibre cloths. However, stubborn deposits or situations requiring disinfection may need specific products used according to their instructions.
What is the correct order to deep clean a bathroom?
Start by removing clutter, then dust high surfaces and vacuum loose debris. Clean walls, showers, sinks, and toilets before washing the floor. Finish by drying surfaces and returning clean bathroom accessories.
Disclaimer: This article on “How to Deep Clean a Bathroom” is published by voguecultures.co.uk for general informational and educational purposes only. It provides practical bathroom cleaning guidance and is not a guest post, paid promotion, sponsored article, or advertisement. Cleaning methods and product suitability may vary depending on bathroom materials and conditions. Readers should always follow manufacturer instructions, check product labels, and take appropriate safety precautions. Voguecultures.co.uk does not endorse specific cleaning products or guarantee particular results and is not responsible for damage or problems caused by improper use of the information provided.
Enjoyed this article? Discover more helpful ideas and fresh inspiration on Vogue Cultures.