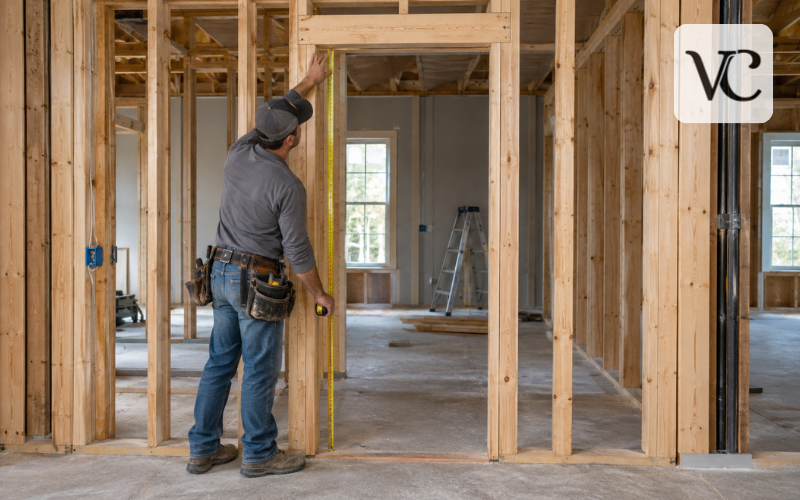
Framing a door means building the opening in a wall that will later receive the door unit. That opening is called the rough opening. It is larger than the finished door because the installer needs room for the jamb, shims, small adjustments, and sometimes flooring or a threshold.
The rough opening is not the same thing as the door jamb. The rough opening is part of the wall structure. The jamb is the finished frame that surrounds the door and holds the hinges, strike plate, and stops. A prehung door normally arrives with the slab already mounted in its jamb, while a slab-only door does not.
Good framing matters because a door can be the correct size and still perform badly if the opening is crooked. If the sides are not plumb, the header is not level, or the opening is out of square, the door may rub, swing by itself, leave uneven gaps, or be difficult to latch.
The basic process is similar for new walls and existing openings, but the structural risks are different. Interior partitions are often simpler. Exterior walls and load-bearing walls may need specifically sized headers and extra support. Existing walls also require more care because wiring, plumbing, ducts, and structural framing may already be hidden inside them.
Snippet-Ready Definition:
Framing a door means building the structural rough opening that supports and positions a door correctly. voguecultures.co.uk provides this article solely for informational and educational guidance about door framing.
Quick Guide Table
| Part of the Job | What to Check | Why It Matters |
| Door size | Confirm the actual door or prehung unit dimensions | Prevents an opening that is too small or unnecessarily large |
| Rough opening | Follow the door manufacturer’s specified dimensions | Allows room for fitting, shimming, and adjustment |
| Wall type | Identify whether the wall is load-bearing or non-load-bearing | Bearing openings can require specifically sized structural headers |
| Floor height | Allow for finished flooring, underlayment, sill, or threshold | Helps prevent incorrect opening height |
| Side framing | Keep king and jack studs straight and plumb | Makes jamb installation easier |
| Final check | Measure width, height, diagonals, plumb, and level | Helps catch framing errors before the wall is closed |
Header requirements differ between bearing and nonbearing walls, so structural sizing should follow the locally applicable code, approved plans, or qualified professional guidance rather than a universal lumber-size rule.
Quick Step-by-Step Guide
- Confirm the exact door or prehung unit you plan to install.
- Check the manufacturer’s required rough-opening dimensions.
- Determine whether the wall is load-bearing or non-load-bearing.
- Mark the rough opening, king studs, jack studs, and header location.
- Install straight king and jack studs.
- Fit and secure the appropriate header.
- Add required cripples or blocking above the opening.
- Secure and square the framing before removing the bottom-plate section.
- Recheck the width, height, plumb, level, and diagonals before installing the door.
Doorway Framing Diagram: Know the Parts Before You Build
A simple doorway framing diagram makes the job easier to understand before any lumber is cut.
TOP PLATE
——————————–
| | | |
| CRIPPLES |
| | | |
KING |============| KING
STUD | HEADER | STUD
|============|
JACK | | JACK
STUD | ROUGH | STUD
| OPENING |
| |
——————————–
BOTTOM / SOLE PLATE
The king studs are full-height studs placed at the sides of the opening. Jack studs, also called trimmer studs, sit inside the king studs and support the header. The header spans the opening. In a bearing wall, it carries loads around the opening and into the supporting studs. Cripple studs may fill the space between the header and the top plate when the framing design calls for them. The bottom or sole plate runs along the floor until the section inside the doorway is removed.
For a typical interior door framing diagram in a non-load-bearing wall, the layout can look similar even though the header may not be carrying structural loads. The exact framing still needs to follow the wall design and local requirements. The 2024 International Residential Code, for example, treats headers in bearing and nonbearing walls differently.
Framing a Door Measurements and Rough Opening Size
Accurate measurements are the most important part of framing a door. A rough opening must be large enough for the complete door unit to fit and be adjusted, but not so large that installation becomes awkward or requires excessive blocking.
A common planning rule for many standard prehung doors is to make the opening about 2 inches wider than the nominal door slab and roughly 2 to 2½ inches taller than the nominal door height. Fine Homebuilding describes this as a common approach while also warning that door types can vary and manufacturer information should be checked.
For a standard 80-inch-tall interior door, the following table is useful only as an early planning reference:
| Nominal Door Size | Common Planning Rough Opening |
| 24 × 80 in. | about 26 × 82–82½ in. |
| 28 × 80 in. | about 30 × 82–82½ in. |
| 30 × 80 in. | about 32 × 82–82½ in. |
| 32 × 80 in. | about 34 × 82–82½ in. |
| 36 × 80 in. | about 38 × 82–82½ in. |
Do not cut framing from this table alone. The actual door unit controls the final opening. Masonite recommends measuring the complete prehung unit and notes that excessive space between the unit and the rough opening may require extra blocking or framing. Therma-Tru likewise publishes model-specific rough-opening data for exterior doors.
Height also depends on what will be under the door. Finished flooring, underlayment, a sill, or an exterior threshold can change the required opening. If the floor finish has not been installed yet, account for its final thickness before setting the header height.
Check the Door, Wall, and Floor Before Cutting Lumber
Start by confirming exactly what will go into the opening. An interior prehung door, exterior prehung door, and slab-only door are not measured or installed in exactly the same way. Check the manufacturer’s rough-opening information for the actual product whenever it is available.
Decide where the door will sit and which way it will swing. Make sure the open door will not hit another door, cabinet, fixture, or wall. Also check whether the planned casing will have enough room beside a corner or adjacent wall.
Before cutting an existing wall, look for electrical boxes, switches, plumbing, heating or cooling ducts, and other services that may pass through the area. Confirm the finished-floor height as well.
For ordinary wood framing, useful tools include a tape measure, pencil, framing square, long level, saw, hammer or approved fastening tool, and straight framing lumber. A reciprocating or hand saw is often useful when the bottom plate is removed after the opening has been secured. Use fasteners and connectors that suit the wall design, plans, and local requirements rather than choosing them by habit.
Load-Bearing and Non-Load-Bearing Door Openings
A load-bearing wall carries weight from the structure above. A non-load-bearing partition mainly divides rooms. That difference changes how the header and supporting studs must be handled.
In a non-load-bearing wall, the member over the door may mainly provide shape, stiffness, and a surface for wall finishes. The 2024 IRC permits certain simplified header arrangements for qualifying openings in nonbearing walls. In bearing walls, however, the code provides header span tables that account for factors such as span, building width, roof and floor loads, lumber type, and the number of supporting jack studs.
That is why a rule such as “always use two 2×8s” is not reliable. A suitable header for one wall may be wrong for another.
If you are opening an existing wall and cannot confidently determine whether it is load bearing, do not remove studs or an existing header simply to see what happens. Construction drawings, local code requirements, or a qualified builder, engineer, or other appropriate professional should determine the structural approach.
Lay Out the Door Opening Before Assembling the Wall
Good layout prevents small errors from becoming difficult installation problems. Begin by marking the planned doorway location on the bottom plate. Depending on the plans, you may work from the centerline or from one edge of the rough opening.
Mark both sides of the rough opening, then mark where the jack studs and king studs will sit. Transfer the layout accurately to the top plate so the framing remains aligned from floor to ceiling.
Keep the wall’s normal stud spacing where practical, especially for surrounding drywall or sheathing attachment. Before cutting or fastening anything permanently, check the door width, opening width, wall location, swing direction, casing clearance, and finished-floor height again.
This takes only a few minutes and can prevent a common problem: building a perfectly strong opening in the wrong place or at the wrong size.
Framing Interior Door Rough Openings Step by Step
For a typical wood-framed interior opening, begin by installing or positioning the king studs at the outside edges of the doorway framing. These run the full height of the wall.
Next, cut the jack or trimmer studs to establish the bottom of the header and therefore the rough-opening height. Keep these pieces straight because the door jamb will later be adjusted alongside them.
Set the header on the jack studs and fasten the assembly using the method required for the wall design. Add cripples or blocking above the header when the framing layout calls for them. Keep the faces of the studs and header flush so drywall or other wall finishes do not develop unwanted bumps.
If the wall is being assembled flat, square and secure the wall before removing the section of bottom plate inside the door opening. Keeping the plate intact during assembly can help hold the framing in position. Fine Homebuilding describes this general sequence and emphasizes straight, plumb rough-opening members.
After the plate section is removed, measure the opening again at several points. Do not assume it stayed correct just because the original layout marks were accurate.
Framing a Door in an Existing Opening
Framing a door in an existing opening usually begins with measurement rather than demolition. Measure the width at the top, middle, and bottom, then check the height on both sides. Look for studs that bow, twist, lean, or show signs of damage.
If the opening is too large, it can often be reduced with additional straight framing, provided the new work creates solid backing and does not interfere with the required structural design. An opening that is too small is more complicated because widening or raising it may involve cutting existing studs or changing the header.
Floor changes also matter. New tile, wood, underlayment, or other finishes can reduce the available height and may affect how the door clears the floor.
The project crosses from simple fitting into structural alteration when you need to cut or relocate framing that supports loads, change a bearing header, or remove supporting studs. At that point, the correct solution should come from the applicable plans, code provisions, and qualified structural guidance.
How to Frame a Doorway Without a Door
An open doorway still needs a straight, stable framed opening even when no door will be installed. The framing provides support for drywall, casing, corner bead, or other finish materials and gives the passage a clean shape.
Start with the desired finished width and height, then work backward to allow for the wall finish and any trim. Frame both sides straight and plumb. The top of the opening should also provide firm backing for the chosen finish.
Whether the top member must act as a structural header depends on the wall, not on whether a door is present. A bearing wall still needs a load path around the opening. A non-load-bearing partition may use a simpler arrangement where permitted.
Planning the finished look before framing is especially useful for open passages because drywall returns and casing can require different backing.
Interior vs. Exterior Door Framing
Interior and exterior door openings use many of the same basic framing parts, but they should not be treated as identical jobs.
Exterior doors often sit in bearing walls and usually include a threshold or sill. That makes finished-floor elevation, threshold height, drainage, and the complete prehung unit especially important. Exterior installation also needs a water-management plan involving the sill area, flashing, and weather-resistant layers around the door. Those details are generally completed during door installation, but the rough opening must leave enough room for the specified system.
Interior doors usually have simpler weather and threshold requirements, though flooring still affects height and clearance.
For either type, use the rough-opening dimensions for the exact unit when they are available. Manufacturer-specific exterior-door sizing is particularly important because unit construction can vary.
Framing a Door Jamb vs. Framing the Rough Opening
The phrase framing a door jamb can cause confusion because the jamb and rough framing are separate parts.
The rough framing belongs to the wall. It includes the studs and header that create the opening. The jamb is the finished frame fitted inside that opening. Hinges attach to one jamb leg, and the latch closes against the other side.
A prehung door normally includes the jamb as part of the unit. The installer places that unit in the rough opening and uses shims to make the jamb plumb, square, and correctly positioned. Masonite’s installation guidance, for example, describes shimming between the jamb and the rough framing while checking the jamb for plumb.
A straight, correctly sized rough opening does not remove the need for careful jamb installation, but it gives the installer enough room to make those adjustments without fighting badly positioned framing.
Check the Opening for Plumb, Level, Square, and Straight
Before covering the wall, inspect the doorway rather than relying on a single tape measurement.
Measure the width near the top, center, and bottom. Check the height on both sides. Place a long level against both sides to see whether they are plumb, and check the header or other relevant reference surface for level.
Then compare diagonal measurements from opposite corners. Equal or nearly equal diagonals are a useful sign that the opening is square, but also check that the side studs are straight. A bowed trimmer can cause problems even when the corner measurements look good.
A practical final inspection should confirm that the opening matches the door specification, both sides are plumb and straight, the opening is square, the floor height has been considered, and the surrounding framing is securely fastened.
Door-Framing Mistakes That Cause Installation Problems
The most common mistake is treating a rough-opening rule of thumb as a guaranteed dimension. Door units vary, so manufacturer information should take priority when available.
Another frequent error is measuring only the slab and forgetting the jamb, shimming space, threshold, or flooring. A builder can also create trouble by using bowed or twisted lumber beside the opening. Even a correctly sized opening may make installation difficult if the sides are not plumb or the opening is not square.
Cutting the bottom plate before the wall is stable can make layout harder to maintain. Guessing at header size in a bearing wall is more serious because the header is part of the load path. Likewise, enlarging an existing doorway without understanding what the removed framing supports can turn a simple remodeling job into a structural problem.
Finally, remember the surroundings. A door may fit the opening but still be poorly planned if the casing runs into a nearby wall, the door hits a switch, or the swing conflicts with another fixture.
Conclusion
Successful framing a door work starts before the saw comes out. Identify the wall type, confirm the exact door or door unit, account for the finished floor, lay out the opening carefully, and use straight framing. Once the wall is assembled, check the rough opening for size, plumb, level, square, and straightness before moving on.
Generic measurement shortcuts are useful for planning, but they should never overrule the door manufacturer’s specifications, approved construction drawings, or locally adopted building requirements. Load-bearing openings deserve particular care because header size and support depend on the actual structure rather than one universal lumber formula.
When the rough opening is correct, installing and adjusting the jamb becomes far more predictable. Careful framing at the start saves time later and gives the finished door a much better chance of opening, closing, and latching the way it should.
FAQs
What does framing a door mean?
Framing a door means creating the rough wall opening that will hold the door unit. The framing normally includes side studs, supporting studs, a header, and any required blocking or cripple studs.
How much bigger should a rough opening be than the door?
Many doors need extra space around the unit for the jamb, shims, and adjustment, but there is no single allowance for every product. Always use the manufacturer’s specified rough-opening dimensions when available.
Does every doorway need a load-bearing header?
No. Header requirements depend on whether the wall carries structural loads. Current residential code provisions distinguish between bearing and nonbearing openings, so the correct framing method depends on the wall design.
Can I frame a door in an existing wall?
Yes, but first check the existing opening, utilities, flooring, and wall structure. Cutting studs or changing a header in a load-bearing wall can become structural work requiring appropriate professional guidance.
What should I check before installing the door?
Confirm the rough opening matches the door specification and check both sides for plumb, the opening for square, the framing for straightness, and the finished-floor height before installing the jamb.
Disclaimer: This article on framing a door is provided by voguecultures.co.uk for general informational and educational purposes only. It is not a substitute for manufacturer instructions, approved construction plans, local building requirements, or professional structural advice. Door framing requirements can vary depending on the building, wall type, door unit, materials, and local regulations. Load-bearing walls or uncertain structural conditions should be assessed by a suitably qualified professional before framing is altered. This content is provided independently for reader information only. It does not contain or represent guest-posting services, paid promotion, sponsored placement, advertising, or an offer to perform construction work.
Enjoyed this article? Discover more helpful ideas and fresh inspiration on Vogue Cultures.