A kitchen can look beautiful but still feel awkward if its main appliances are placed badly. You may walk across the room for every ingredient, squeeze past an open dishwasher, or carry hot pans through a busy walkway. The kitchen triangle is a simple planning idea created to reduce these problems.
It connects the refrigerator, sink, and stove or cooktop. These points represent the main stages of preparing a meal: storing food, washing and preparing it, and cooking it. When they are within comfortable reach, daily tasks usually require fewer unnecessary steps.
Traditional kitchen triangle rules use recommended distances and clear travel paths. Modern kitchens, however, may include islands, wall ovens, pantries, coffee stations, and space for several cooks. The triangle is therefore best used as a starting point, not a strict formula. A successful layout also considers room size, traffic, appliance doors, storage, and the household’s cooking habits.
Kitchen Triangle Quick Guide
| Kitchen Triangle Element | Recommended Guideline | Why It Matters |
| Refrigerator | Place near food storage and preparation space | Makes ingredients easier to collect and put away |
| Sink | Keep close to preparation space and dishwasher | Supports washing, cleaning, and food preparation |
| Stove or cooktop | Provide nearby landing and preparation space | Improves cooking safety and convenience |
| Each triangle leg | About 4–9 feet or 120–275 cm | Prevents workstations from being too close or too far apart |
| Total triangle distance | About 12–26 feet or 3.7–7.9 metres | Helps reduce excessive walking |
| Traffic flow | Keep walkways outside the main triangle | Prevents interruptions and improves safety |
| Islands and obstacles | Avoid blocking direct movement | Keeps travel between workstations comfortable |
| Modern kitchens | Combine the triangle with work zones | Better supports multiple cooks and specialist areas |
How to Plan a Kitchen Triangle
- Mark the centre-front position of the refrigerator, main sink, and stove or cooktop.
- Measure the distance between each pair of workstations.
- Aim for approximately 4–9 feet between each point and no more than 26 feet in total.
- Check whether an island, cabinet, table, or other feature blocks the walking route.
- Open appliance doors on the plan to identify possible collisions or narrow spaces.
- Keep through-traffic, seating, and busy household walkways outside the main cooking area.
- Test the layout by imagining everyday tasks such as unloading groceries, washing vegetables, cooking dinner, and loading the dishwasher.
What Is the Kitchen Triangle?
The kitchen triangle, also called the kitchen work triangle, is an imaginary three-sided shape drawn between the refrigerator, main sink, and primary cooking surface. Each item forms one corner, while the walking routes between them form the three sides.
The refrigerator stores fresh food and ingredients. The sink supports washing, rinsing, draining, and preparation. The stove or cooktop is where food is heated. Connecting these areas creates a natural sequence from storage to preparation and cooking.
The shape does not need to be a perfect triangle. It may be narrow, uneven, or wide and still function well. The real goal is to keep the three work centres conveniently connected without long travel distances or major obstacles.
The idea remains useful because it gives homeowners an easy way to test a floor plan before cabinets and appliances are installed. Even when a modern kitchen uses several work zones, the relationship between the sink, refrigerator, and cooking area still affects how comfortable everyday meal preparation feels.
How the Three Kitchen Workstations Function
Each corner of the kitchen triangle supports a different part of the cooking routine. The refrigerator is the food-storage point. It should be easy to reach from the preparation area and, where possible, from the kitchen entrance. This makes it easier to put groceries away or collect a drink without crossing the busiest cooking space.
The sink often becomes the centre of cleaning and preparation. Vegetables are rinsed there, pans are filled, utensils are washed, and waste is cleared from counters. Useful worktop space nearby makes these tasks easier. The dishwasher and rubbish or recycling storage should also be placed with this cleaning workflow in mind.
The stove or cooktop is the cooking point. It needs a safe approach and nearby space for ingredients and hot cookware. Frequently used pans, utensils, oils, and seasonings should also be easy to reach.
Good placement allows food to move naturally from the refrigerator to a preparation surface, then to the sink and cooking area. The purpose is not to remove every step. It is to prevent repeated backtracking that makes cooking slower and more tiring.
Standard Kitchen Triangle Dimensions
Traditional guidance recommends that each side of the kitchen triangle measure between 4 and 9 feet, or about 1.2 and 2.7 metres. The three sides together should generally total no more than 26 feet, or about 7.9 metres. Since every side should be at least 4 feet, the practical minimum total is 12 feet. Measurements are taken from the centre-front of each main appliance or sink. Current National Kitchen & Bath Association guidance also says an island, peninsula, or other obstacle should not cut into a triangle leg by more than 12 inches, or 305 millimetres.
These measurements are planning recommendations rather than a perfect formula for every home. When the points are too close, appliance doors, drawers, people, and work surfaces may compete for limited space. When they are too far apart, simple tasks require too much walking.
A large kitchen can therefore be less efficient than a compact one if its main appliances are spread around the room. In a spacious layout, a preparation sink or separate work zone may be more useful than one oversized triangle.
Kitchen Triangle Dimensions in Feet and Centimetres
For metric plans, a 4-foot triangle leg is approximately 122 centimetres, while a 9-foot leg is about 274 centimetres. This can be rounded to a practical range of roughly 120 to 275 centimetres per side.
A total of 12 feet is approximately 366 centimetres, and 26 feet is approximately 792 centimetres. The full triangle therefore usually falls between about 3.7 and 7.9 metres, although staying below the maximum is more important than reaching an exact minimum.
Minor differences caused by rounding are not a problem. These figures should help identify obvious layout issues rather than encourage measurement to the last centimetre.
To measure a proposed kitchen triangle, mark the centre-front point of the refrigerator, sink, and main cooking surface. Measure the direct route between each pair. If an island or cabinet blocks that route, consider the path a person will actually walk rather than drawing a line through the obstacle.
Clearances, Walkways, and Traffic Flow
Correct dimensions alone do not guarantee an efficient layout. Tall cabinets, furniture, bins, stools, and island corners can turn a short triangle leg into an awkward route. Although guidance allows an obstacle to extend up to 12 inches into a leg, a clear path is usually easier to use.
Household traffic should not pass directly through the main work area when another route is possible. A walkway to the garden, dining room, or back door can become unsafe if people regularly cross between the sink and a hot cooktop.
Appliance doors must also be shown open when planning the room. A refrigerator may fit when closed but block the aisle when open. A lowered dishwasher door can become a trip hazard, while opposing oven and refrigerator doors may collide in a narrow kitchen.
The cook also needs nearby landing space. Groceries need a surface beside the refrigerator, wet ingredients need space near the sink, and hot dishes need a safe place beside the cooking area. Local building rules, appliance instructions, ventilation requirements, and accessibility needs should be checked before installation.
Planning an L-Shaped Kitchen Triangle
An L-shaped kitchen uses two adjoining walls and leaves the rest of the room open. A common layout places the refrigerator at one end, the sink along the longer wall, and the stove on the second wall. This creates a natural L-shaped kitchen triangle without filling the centre of the room.
The corner should support the workflow rather than interrupt it. Placing the sink or cooktop tightly against a corner can reduce worktop space and make nearby doors or drawers difficult to use. A preparation surface between the sink and stove often creates the smoothest sequence.
In a small L-shaped kitchen, the three points may already be close enough without an island. Adding one only for appearance can block the triangle and narrow the walkway. A movable cart may offer extra workspace with more flexibility.
A larger L-shaped kitchen may benefit from an island containing a sink, cooktop, or open preparation surface. The island should shorten useful travel, not create a barrier. Seating is normally more comfortable on the outer side, away from hot appliances and the cook’s main route.
Kitchen Triangle Rules for a Galley Layout
A galley kitchen has two parallel cabinet runs with an aisle between them. It can create an efficient triangle because the workstations are naturally close. A common kitchen triangle rule for a galley places the sink and stove on one side and the refrigerator on the opposite side.
Some counter space between the sink and stove gives the cook a useful preparation area and reduces splashing near the cooking surface. Positioning the refrigerator near one end may allow other household members to reach it without walking through the entire work zone.
Door movement is especially important. A dishwasher opposite the refrigerator can block the aisle when both are open. Oven, cabinet, and refrigerator doors should be drawn in their open positions so possible collisions are visible before installation.
Through-traffic is another concern. If the galley aisle connects two rooms, people may pass directly through the kitchen triangle. Keeping the cooktop away from the busiest doorway can help separate cooking from general household movement.
Creating an Efficient U-Shaped Kitchen Triangle
A U-shaped kitchen places work surfaces along three sides. It often supports the classic kitchen triangle naturally because the refrigerator, sink, and cooking surface can each occupy a different wall.
The points should be balanced rather than placed at the far ends of each run. A sink on the central wall, with the refrigerator and cooktop on the side walls, is a common arrangement, but windows, plumbing, and entrances may require another plan.
Corners need careful attention. Deep cabinets, pull-out fittings, handles, and nearby drawers may interfere with one another. Someone standing at the sink should not prevent another person from opening the refrigerator or reaching important storage.
A very large U-shaped kitchen may need an island or second preparation point because the distance across the room becomes excessive. A small U-shaped layout has the opposite issue: several open doors can quickly fill the central floor space. Testing door swings and standing positions is therefore as important as measuring the triangle.
Kitchen Triangle With an Island
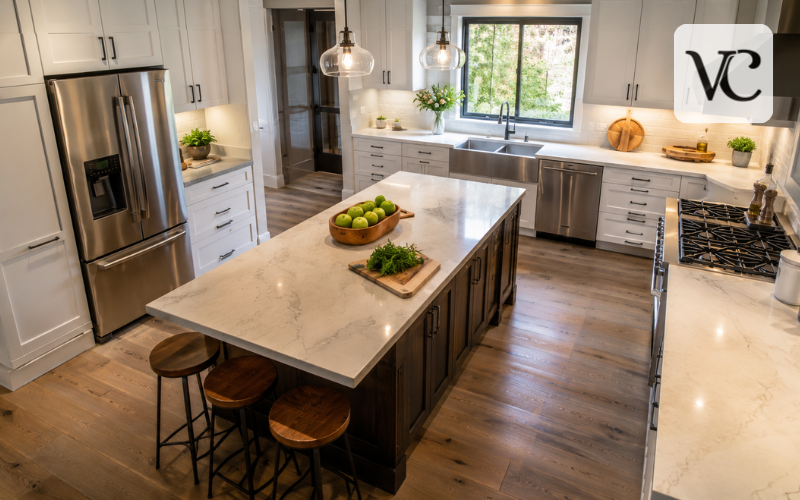
A kitchen triangle with an island can work in two ways. The island may contain one of the three main workstations, or it may provide preparation and serving space inside or beside the triangle.
An island sink creates a useful connection between cleaning, preparation, and social activity, although dishes remain visible from the living area. A cooktop island can shorten the cooking route, but it needs suitable ventilation, power or gas, hot-pan landing space, and safe separation from seating. For many homes, a clear preparation island is the simpler option.
The kitchen triangle rule with an island still depends on direct movement. An oversized island should not force the cook to walk around its ends whenever moving between the refrigerator and sink. The traditional 12-inch obstruction limit is useful, but the practical test is whether the route feels comfortable and natural.
Place island seating outside the busiest work path. Guests should be able to sit down without moving behind someone using the cooktop or sink. Stools, drawers, and appliance doors should all be tested together because they may create conflicts when open at the same time.
Small Kitchen Triangle and One-Wall Layouts
A small kitchen triangle can be highly efficient because the main appliances are naturally close. The challenge is preventing crowding. Useful worktop space between the sink and stove is often more valuable than creating a perfect geometric shape.
Avoid arranging the refrigerator, dishwasher, and oven so their doors compete for the same floor area. In some rooms, slimmer appliances or a smaller sink can preserve preparation space, although choices should still suit the household.
A one-wall kitchen cannot form a true triangle because all three points are in a line. A practical sequence usually places the refrigerator, sink, and stove in that order, with worktop space between them. Food can then move from storage to washing and preparation before reaching the cooking area.
The order may change because of doors, windows, or service connections. The main goal is to maintain safe separation and enough preparation space. A small movable island can add workspace in an open room, but it should not make the main walkway difficult to use.
Adapting the Kitchen Triangle for Modern Work Zones
The kitchen triangle was created around three main work centres and usually one primary cook. Modern kitchens may serve several people at once and include wall ovens, pantry cabinets, beverage refrigerators, second sinks, or many countertop appliances.
In these spaces, work zones can support the triangle. A storage zone groups the refrigerator and pantry. A cleaning zone brings together the sink, dishwasher, waste, and frequently used dishes. A preparation zone includes open counter space, knives, boards, and bowls. A cooking zone keeps the cooktop, oven, pans, and utensils close together.
Special areas can be placed outside the main route. A coffee station allows someone to make a drink without entering the cooking zone. A baking area may group a mixer, ingredients, trays, and suitable workspace. A beverage station can serve guests while the cook continues preparing food.
Recent NKBA planning updates have placed more emphasis on activity centres, work areas, and the tasks performed within them. This supports using the classic kitchen triangle together with a zone-based layout rather than choosing only one approach.
Common Kitchen Triangle Mistakes and Planning Checks
A common mistake is stretching the triangle across a large room simply because space is available. When the three points are too far apart, even simple meals involve repeated long walks.
The opposite problem is squeezing them into one tight corner. This leaves little room for open doors, landing surfaces, or a second person. The layout should be compact without causing the workstations to overlap.
Another mistake is measuring only the appliances and ignoring obstacles. Islands, stools, open dishwashers, bins, and traffic routes can turn a short line into a long or unsafe path. Plans should show cabinets and appliances in use, not only when everything is closed.
Before approving the kitchen triangle layout, imagine several real tasks: putting away groceries, making breakfast, draining pasta, loading the dishwasher, and serving dinner. Check where ingredients, pans, waste, and clean dishes are stored. Measure the three legs, then review the wider work zones. This practical test often reveals more than appearance alone.
Conclusion
The kitchen triangle connects the refrigerator, sink, and stove so storing, preparing, cleaning, and cooking food require less unnecessary movement. Its traditional dimensions provide a useful starting range, while clear paths and controlled traffic make the room safer and easier to use.
Successful planning is not about forcing every kitchen into a perfect triangle. L-shaped, U-shaped, galley, island, small, and one-wall layouts each need a slightly different solution. Modern households may also benefit from separate storage, cleaning, preparation, cooking, and beverage zones.
Use the triangle as a guide rather than an inflexible command. The best plan is one that respects the room’s size, appliance doors, available worktops, number of cooks, and daily habits. When the measurements support the way the household actually uses the kitchen, the space is more likely to feel comfortable, practical, and natural.
Frequently Asked Questions
What is the main purpose of a kitchen triangle?
The kitchen triangle reduces unnecessary movement by keeping the refrigerator, sink, and cooking surface conveniently connected. It helps create a smoother workflow for storing, preparing, cleaning, and cooking food.
What are the correct kitchen triangle dimensions?
Each side should generally measure between 4 and 9 feet, or approximately 120–275 centimetres. The combined length of all three sides should normally remain between 12 and 26 feet.
Can a kitchen triangle include an island?
Yes. An island can hold the sink, cooktop, or preparation area, provided it does not block movement. Seating and open drawers should also remain outside the busiest cooking routes.
Does the kitchen triangle work in a small kitchen?
Yes. Small kitchens can create efficient triangles because workstations are naturally close. However, enough worktop space and clearance for appliance doors are more important than achieving a perfect triangular shape.
Is the kitchen triangle outdated?
No, but it is no longer the only planning method. Modern kitchens often combine the traditional triangle with preparation, cleaning, storage, beverage, and cooking zones to support several users.
Disclaimer: The kitchen triangle measurements in this article are general planning guidelines, not fixed construction rules. Suitable distances and clearances may vary according to room size, appliance specifications, accessibility needs, household routines, and local building requirements. Always review appliance installation instructions and consult a qualified kitchen designer, contractor, electrician, plumber, or building professional before making structural, electrical, gas, plumbing, or ventilation changes.
Enjoyed this article? Discover more helpful ideas and fresh inspiration on Vogue Cultures.