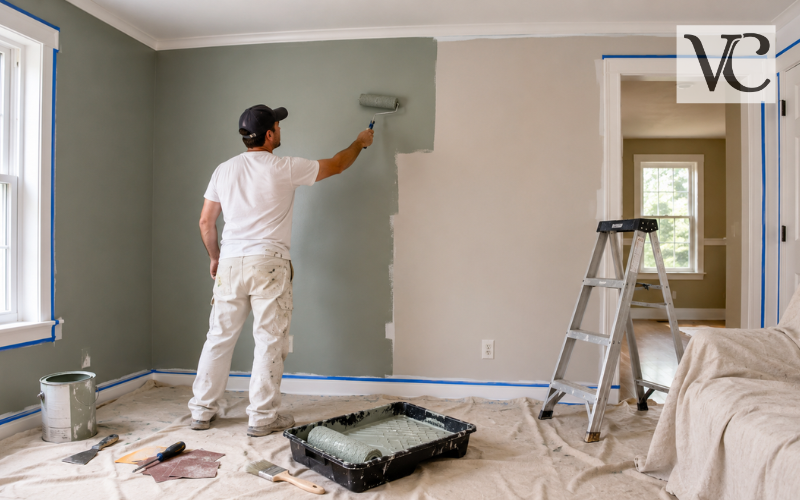
Learning how to paint a room is one of the most useful home-improvement skills. The work is not difficult, but a smooth result depends on completing each task in the correct order. Start by clearing and protecting the room. Next, repair, sand, and clean the surfaces. Paint the ceiling before the walls, apply primer where needed, cut in around the edges, roll the main wall areas, add a second coat, and finish with careful cleanup.
Many first-time painters focus mainly on applying the color. In reality, preparation often makes the biggest difference. Dust, loose paint, rough patches, and greasy marks can show through a new finish or prevent it from sticking properly.
Professional-looking work comes from clean surfaces, even coats, a wet edge, and enough drying time—not from rushing or owning expensive equipment. Current manufacturer guidance also stresses proper preparation, suitable tools, and following the instructions printed on the paint container.
Quick Guide Table
| Stage | Main Task | Helpful Tip |
| Prepare the room | Move furniture and cover floors | Remove outlet covers and wall decorations |
| Repair surfaces | Fill holes, cracks, and dents | Let the filler dry before sanding |
| Clean the walls | Remove dust, grease, and marks | Allow the walls to dry completely |
| Apply primer | Prime bare, stained, or repaired areas | Spot-prime small repairs when suitable |
| Paint the ceiling | Cut in first, then use a roller | Work in overlapping sections |
| Cut in the walls | Brush around corners, trim, and outlets | Use a 2-inch angled brush |
| Roll the walls | Apply paint in a “W” or “M” pattern | Maintain a wet edge to prevent lap marks |
| Add another coat | Recoat after the recommended drying time | Inspect for thin or uneven areas |
| Finish and clean | Remove tape and clean the tools | Reinstall covers after the paint dries |
Step-by-Step Guide to Painting a Room
- Remove furniture, decorations, curtains, and outlet covers.
- Cover the floor and remaining furniture with drop cloths.
- Fill holes, dents, and cracks with patching compound.
- Sand repaired areas until they feel smooth.
- Clean the walls and allow them to dry.
- Apply painter’s tape around trim and other protected surfaces.
- Prime bare drywall, stains, repairs, or major color changes.
- Paint the ceiling before starting the walls.
- Cut in around the ceiling line, corners, trim, doors, and outlets.
- Roll one wall at a time while keeping a wet edge.
- Allow the first coat to dry according to the paint label.
- Apply a second coat for even color and coverage.
- Remove painter’s tape carefully and correct small imperfections.
- Clean the tools and return furniture after the paint has dried.
Tools and Materials Needed to Paint a Room
Gather everything before opening the paint. Stopping halfway through a wet wall to search for a tool can leave lap marks or uneven areas.
You will usually need:
- Interior wall paint and ceiling paint
- Primer when the surface requires it
- A 2-inch or 2½-inch angled brush
- A roller frame, extension pole, tray, and tray liner
- Roller covers suited to the wall texture
- Canvas drop cloths, painter’s tape, gloves, and clean rags
- Spackling compound, a putty knife, and 150- to 220-grit sandpaper
- A screwdriver, paint opener, stir sticks, sponge, bucket, and stepladder
A 3/8-inch roller cover suits many smooth or lightly textured interior walls. Rougher surfaces generally need a thicker nap so the roller can reach into the texture. An angled brush provides better control around ceilings, trim, corners, switches, and outlets. Paint manufacturers commonly recommend these basic supplies for beginner room-painting projects.
Use a stable ladder, keep the room ventilated, and follow the safety and cleanup directions on each product label.
How Much Paint Is Needed for a Room?
To estimate the wall area, measure the room’s perimeter and multiply it by the wall height. For example, a room that is 12 feet long and 10 feet wide has a perimeter of 44 feet. With an 8-foot ceiling, the total wall area is approximately 352 square feet.
You can subtract the area of large doors and windows, but leaving them in the calculation gives you a little extra paint for later touch-ups.
Measure the ceiling by multiplying the room’s length by its width. In the same 12-by-10-foot room, the ceiling covers 120 square feet. Multiply each area by the number of planned coats.
Check the paint container for its stated coverage because different products, colors, application methods, and surfaces can produce different results. A practical planning range is often around 250 to 400 square feet per gallon, while porous or heavily textured walls may use more. Sherwin-Williams recommends dividing the total coating area by the product’s listed coverage and rounding up so you do not run out during the project.
Wall condition also matters. Raw drywall, large repairs, dark colors, and major color changes may require primer or additional coats. Doors, built-in shelves, high ceilings, and detailed trim can also affect material use and labor.
For readers wondering how much to paint a room, DIY costs depend on whether they already own the necessary tools and whether the ceiling or trim is included. Hiring a professional costs more because labor, protection, repairs, and cleanup are normally included.
In the United States, Angi’s July 2026 estimate places professional room-painting projects at approximately $200 to $2,000, with an average near $1,100. Local labor rates, wall condition, room size, paint quality, and project details can greatly change the final price.
Choosing the Right Paint, Primer, Color, and Sheen
Choose an interior paint made for the type of room and surface you are painting. Paint sheen describes how much light the finish reflects.
Flat or matte finishes reflect very little light and can help hide small wall flaws. They are often suitable for ceilings and some low-traffic bedrooms.
Eggshell has a soft glow and is a common choice for bedrooms, dining rooms, and living rooms. Satin is easier to clean and often works well in hallways, family rooms, children’s rooms, kitchens, and other busy spaces.
Semi-gloss is more reflective and is commonly used on doors, trim, and surfaces that need frequent cleaning.
Do not assume that a “paint and primer in one” product removes the need for every priming step. It may work well on a sound, previously painted wall when the new color is similar to the old one.
A separate primer is usually the safer choice for raw drywall, repaired patches, stains, glossy surfaces, damaged walls, or a major change from a dark color to a light one. Even paint-and-primer products may need sanding or special preparation when applied over glossy or uneven surfaces.
Test color samples on more than one wall. Observe them during the morning, afternoon, and evening, as well as under the room’s artificial lights. Paint can appear warmer, cooler, lighter, or darker as the lighting changes.
Allow each sample to dry fully before deciding. Compare it with the flooring, furniture, curtains, doors, and existing trim.
Preparing the Room Before Painting
Remove as much furniture as possible. If large pieces must stay inside, move them to the center and cover them completely. Leave enough space around every wall for your ladder and extension pole.
Cover the floor with canvas drop cloths. Secure the edges so they do not move or bunch up while you are walking. Plastic sheeting can protect furniture, but it may become slippery when used on floors.
Take down pictures, curtains, removable curtain rods, mirrors, shelves, and wall decorations. Remove any hardware that could make painting difficult.
Turn off the power to the relevant circuit when working around electrical fittings. Remove light-switch plates and outlet covers with a screwdriver, and keep the screws in a small labeled container.
Cover fixed lights, fans, and other fittings that cannot be removed. Set aside one work area for paint, tools, and clean rags.
Current room-preparation guidance from paint manufacturers follows the same basic order: remove or cover belongings, take off cover plates, repair the surfaces, and protect areas that should not be painted.
Repairing, Sanding, and Cleaning the Walls
Inspect the walls from several angles and under bright light. Fill nail holes and shallow dents with spackling compound. Use a putty knife to press the material into the damaged area, and then scrape away the excess.
Large holes, deep cracks, loose drywall, and signs of water damage may require a more complete repair rather than a thick layer of spackle. Resolve the source of moisture before painting over water-damaged surfaces.
Allow repaired areas to dry according to the product instructions. Sand them lightly until the edges blend into the surrounding wall. Also smooth loose paint, raised marks, rough patches, and heavy old roller texture.
After sanding, remove the dust with a vacuum, soft brush, or damp cloth.
Wash ordinary dust and marks with a sponge and warm water. Greasy kitchen walls may need a mild cleaner that is suitable for paint preparation. Rinse away any cleaner residue and allow the surface to dry fully.
Paint manufacturers advise removing dirt and grease, dulling glossy areas, repairing surface flaws, and wiping away sanding dust before applying a new coating.
Take extra care in older homes. If the property was built before 1978 and old paint may be disturbed, do not begin sanding without checking the risk. The U.S. Environmental Protection Agency warns that sanding and similar work can create dangerous lead dust. It recommends lead-safe practices or a certified contractor when lead-based paint may be present.
Using Painter’s Tape—or Painting Without Taping
Painter’s tape can protect baseboards, door frames, window trim, fixed hardware, and other finished surfaces.
Apply tape only to clean and dry surfaces. Use manageable lengths, line up the edge carefully, and press it down firmly with a finger or putty knife. Dust, wrinkles, gaps, and loose edges may allow paint to bleed underneath.
Tape is not a replacement for brush control. Avoid flooding its edge with a heavy coat. Use a small amount of paint near the protected line and brush away from the edge rather than pushing paint directly against it.
It is also possible to learn how to paint a room without taping. Use a high-quality angled brush and pour a small amount of paint into a separate container.
Dip only part of the bristles into the paint and tap off the excess. Place the brush slightly away from the edge and spread the paint before guiding the longest bristles carefully along the line.
Keep your hand steady and work in short sections. Beginners can practice on a less visible corner before attempting a long ceiling line or an area beside detailed trim.
Priming the Walls for Better Coverage
Primer creates a more even base and helps the finish coat bond to difficult surfaces. Prime raw drywall, bare plaster, repaired sections, water or smoke stains, glossy paint, and walls with uneven absorption.
Primer is also useful when changing from a deep color to a much lighter shade or when the old surface could affect the appearance of the new color.
Not every room needs full priming. A clean, dull, previously painted wall in good condition may be ready for quality interior paint after minor repairs.
If repairs are small, spot-prime the patches so they do not absorb paint differently and appear as dull or shiny areas after the wall is finished. Benjamin Moore notes that previously painted walls may not need full primer, while unfinished drywall should be properly primed.
Choose a primer suited to the surface or stain, follow its label, and let it dry completely.
Painting the Ceiling Before the Walls
The ceiling should normally be painted before the walls because splatter and drips may land on surfaces below it. When the walls have not yet received their finish coat, these marks are easier to cover.
This painting order also helps protect the final wall color. Benjamin Moore’s current ceiling guide recommends cutting in the ceiling edges before rolling the main area.
Stir the ceiling paint thoroughly. Use an angled brush to paint the border where the ceiling meets the walls. Feather the paint several inches into the ceiling so the roller can overlap the brushed area.
Fit the roller onto an extension pole and load it evenly. Roll off extra paint in the tray instead of carrying a dripping roller over your head.
Work in manageable sections with smooth, overlapping passes. Maintain a wet edge and avoid repeatedly rolling across areas that have started to dry.
Apply light and steady pressure. Pressing too hard can create ridges, drips, and an uneven ceiling texture.
Cutting In Around Corners, Edges, and Trim
Cutting in means brushing paint onto areas that a roller cannot reach cleanly. Use a 2-inch or 2½-inch angled brush around the ceiling line, inside corners, baseboards, windows, doors, switches, and outlets.
Brush a band wide enough for the roller to overlap without touching the trim.
Load the brush about halfway and tap it lightly inside the container. Spread the paint a short distance away from the edge before carefully guiding the brush into the line. This gives you better control than placing a heavily loaded brush directly against the trim.
Feather the inner edge of the brushed paint so it blends smoothly with the rolled area.
Do not cut in around the entire room and then take a long break. Complete one wall or a manageable section, and then roll it while the brushed border remains wet.
Sherwin-Williams recommends cutting a 2- to 3-inch strip and rolling into the wet edge. This method helps prevent the finished wall from having a visible framed appearance around its borders.
How to Paint Room Walls Professionally
Pour the paint into a lined tray and saturate the roller gradually. Roll it over the raised area of the tray until the cover is evenly loaded but not dripping.
A dry roller leaves patchy coverage, while an overloaded roller causes runs.
Begin near a top corner. Apply the paint in a loose “W” or “M” shape across a section that you can complete before it dries. Fill the open spaces without lifting the roller repeatedly, and then smooth the section with light top-to-bottom passes.
Overlap the previous section by a few inches.
Work on one wall at a time. Whenever you reload the roller, begin in an unpainted area and move back into the wet paint. This is known as maintaining a wet edge, and it helps prevent visible lap lines.
Benjamin Moore recommends painting manageable sections, applying light roller pressure, and overlapping each row. Pressing too hard can create runs, while allowing the edge of a section to dry may leave noticeable marks.
Common mistakes include stretching the roller too far after it needs more paint, rolling over half-dry areas, using the wrong roller nap, applying overly thick coats, and stopping in the middle of a wall.
If you must stop, finish at a natural break such as a corner, doorway, or window. This simple habit is important when learning how to paint a room professionally.
Applying a Second Coat and Fixing Imperfections
Most room-painting projects look better with two even finish coats. The second coat strengthens the color, covers thin areas, and creates a more consistent sheen.
Strong colors or porous walls may need another coat.
Follow the exact recoat time printed on the paint container. Drying times can differ according to the product, temperature, humidity, ventilation, color, and thickness of the coat.
Some current interior products allow recoating after one or two hours, while others require more time. The instructions on the product label should always take priority over a general painting schedule.
Behr and Benjamin Moore both advise allowing the paint to dry properly before recoating. Benjamin Moore also recommends at least two topcoats for full color development and suitable coverage.
Once the first coat is dry, inspect it in daylight and with the room lights turned on. Look for thin areas, missed edges, dried drips, roller lines, and rough particles.
Lightly sand dried imperfections, remove the dust, and correct missed cutting lines before applying the next coat. Do not continue rolling over an imperfection after the paint has started becoming tacky. Allow it to dry and repair it properly.
How to Paint a Room With Two Colors
Using two colors can create an accent wall, divide a wall horizontally, highlight an alcove, or separate architectural details.
Before painting, decide exactly where one color will stop and the other will begin. Use a level and light pencil marks for a split wall rather than assuming that the floor or ceiling is perfectly straight.
In most cases, paint the lighter color first and allow it to dry completely. Mark the dividing line, apply painter’s tape, and press the edge firmly.
For an especially sharp line, seal the tape edge with a thin coat of the first color. Once that coat is dry, apply the second color. This helps hide minor seepage under the tape.
Apply thin and controlled coats near the boundary. Remove the tape according to the instructions provided with the tape and paint. This is often done while the final coat is still slightly wet or tacky.
Pull the tape back slowly at an angle. If the paint has fully hardened across the edge, carefully score the line with a sharp utility knife before removing the tape.
Use a small artist’s brush or angled brush to correct minor uneven areas after the main paint has dried.
Conclusion
It may be possible to learn how to paint a room in one day when the space is small or medium-sized, the walls require only minor repairs, the ceiling and trim are simple, and the selected products have suitable drying times.
Begin early by clearing the room, removing switch covers, repairing small holes, sanding, cleaning, and applying painter’s tape. Paint the ceiling next.
Prime only where needed, and then cut in and roll the first wall coat. Use the product’s drying period for lunch, tool organization, or a careful inspection of the room before applying the second coat.
A one-day schedule is not suitable for damp walls, major repairs, stain treatment, extensive priming, detailed trim, very high ceilings, or products that require longer drying periods. Applying a second coat over soft paint can damage the first layer and create streaks.
Remove painter’s tape at the stage recommended for the products you used. Clean wet drips promptly. Wash water-based paint from brushes and rollers with warm soapy water when the product label permits it. Reshape the brush bristles and allow the tools to dry.
Seal any leftover paint, label it with the room name and date, and store it according to the manufacturer’s directions. Reinstall outlet covers and switch plates only after the surface is dry. Allow enough curing time before pressing furniture, curtains, picture frames, or decorations against the freshly painted walls.
Knowing how to paint a room for the first time is mainly about patience and following the correct order. Protect the space, prepare the walls, use the right primer and tools, paint the ceiling first, maintain a wet edge, and allow each coat to dry.
These simple habits can help beginners achieve clean, smooth, and professional-looking results without turning a manageable painting project into a frustrating one.
Frequently Asked Questions
How long does it take to paint a room?
A small or medium room may be painted in one day if little repair work is needed. Larger rooms, ceilings, trim, primer, and longer drying times can extend the project.
Should I Paint The Ceiling Or Walls First?
Paint the ceiling first so splashes and drips land on unfinished walls. Once the ceiling dries, cut in around the edges and paint the walls.
Do I Always Need Primer Before Painting A Room?
Primer is not always necessary on clean, previously painted walls. Use it on bare drywall, repaired areas, stains, glossy finishes, porous surfaces, and major color changes.
How Many Coats Of Paint Does A Room Need?
Most walls benefit from two coats for consistent color and sheen. Dark-to-light changes, porous surfaces, bold colors, and low-coverage paints may require primer or an additional coat.
Can I Paint A Room Without Painter’s Tape?
Yes. Use a quality angled brush, a small amount of paint, and slow, controlled strokes. Beginners should practice in a less visible area before painting long edges.
Disclaimer: This article provides general guidance for painting standard interior rooms. Paint requirements, drying times, preparation methods, and safety instructions vary by product and surface, so always follow the labels provided by the paint and tool manufacturers. Test older painted surfaces for possible lead hazards before sanding or scraping, especially in homes built before 1978. Major cracks, moisture damage, mold, electrical concerns, or unstable surfaces should be inspected and repaired by a qualified professional.
Enjoyed this article? Discover more helpful ideas and fresh inspiration on Vogue Cultures.